Showing posts with label DieCutCrazy. Show all posts

Friday, August 29, 2014

Labor of Love

Okay these are not childbirth photos so you can go ahead and look at the photos :^)
I'm scrapping at the Sharon Memories here in Olympia and wanted to share my first completed layout with you. 
Pictures of three special dads available for spending Father's Day with are offset with warm wood tones, blues and even the surprising pink! 
I'm hoping my honey will journal about his road to fathering and what it's like parenting our brood (does two count as a brood?)- I even placed a sticker of an old fashioned pen at an angle a lefty like himself would hold it.
Nautical stickers echo the Gig Harbor Historical Society's emphasis on the Mosquito Fleet's local influence . I also added a burlap lol through the magic of Washi tape!
Thanks for cropping by to craft with me tonight!
♡ Anna


Sent from my Verizon Wireless 4G LTE smartphone

Friday, August 15, 2014

Die Cut Crazy Birthday Blog Hop!


 Welcome back! I'm glad you stopped by today, because there is a super fun birthday themed Blog Hop going on amongst my Co-Contributor's at DieCutCrazy.com. This month, Eric from the PaperWizard has donated a lovely piece of blog candy, so be sure to comment on everyone's blog for a chance to win that! If you can follow us on facebook and hit the Like button on my post from yesterday, you can win a little something from ME as well :-D We're all so excited for the launch of our new website too! I hope you enjoy my little birthday card, it's full of die cuts and should somewhat easy to duplicate in your craft space of choice :-)

Ah, birthdays... who doesn't love a good excuse for a party, huh? Well, I've been surprised over the years, how many people actually don't enjoy them, but I wasn't raised that way. Having a daughter born on New Year's Eve meant my mom sacrificed a lot of year end partying in order to make my birthday special each year. Even as I've gotten older and said things like, "Oh mom, do what you want this year, I'm grown enough to be happy with a special meal with my family." She just laughs and says she'll be on call lol. Without fail, she always mentions that it must be time for my half birthday, as well! What a mom :-D

For this card, I used die cuts from the Basic Grey RSVP ephemera pack. Using preselected, coordinated die cuts makes it so easy to create a card with lots of layers and depth; just select a few pieces that seem to fit together, glue them with some multi-dimensional adhesives, and voila! You've created an intriguingly beautiful card for your bestie, man, mom, or whoever's birthday might catch you off guard in the future. I was so excited for this hop, because it seems you can never have too many birthday cards on hand, am I right?

I have been wanting to use that flowered frame for awhile, and this project was the perfect occasion. There was a smaller frame within it that I wanted to have a little more lift too, so I managed to cut my very tiny foam squares even tinier to fit in that thin underspace. It can be kind of annoying when a corner of your foam adhesive peaks out from under your layers, but no worries, I usually just add some more layers on top! 

The bottom right corner where this happy little accident occurred was just the right spot to add some flowers. I chose one of shimmery fabric, and one made from mulberry paper,  the little brad holds it all together and eliminated the need to find yet another type of adhesive to hold it all together. Ever since I started selling my cards, the idea of my card not falling apart after I've made it is a lot more appealing.
Now, after adding the acetate flowers die cut under the frames, and the Party banner on top, my card was looking oh so festive, but I wanted it to be somewhat summery, so I thought about some stamp sentiments I could make work for me. A package of K & Co. die cuts with fancy borders has been very handy to have around, it came with four or five different shapes, and was very inexpensive at Michael's.  Ever made a stamping mask before? Simply stamp your sentiment or image onto a scratch piece of paper. I like to grab a post-it note, and there are lot's of new products out there made for this type of fun too. Another way to use the one word from this stamp would have been to just color in the word "garden" with a marker and stamp it that way onto that K & Co. die cut.
After stamping your image, carefully cut out the part of the stamp you want to show on your project. Line it up in the desired location, stamp over, and looky-here, you have a perfect stamped phrase without any mess.
It's nice to continue the theme of your card on the inside as well, so I stamped some CloseToMyHeart flowers off the page and a simple birthday sentiment to finish this birthday card.  Another advantage to the post it notes? They are thin and come in a variety of colors, so if you aren't the best stamper (like me) and you make a boo-boo,* you can just cut out the post it note version and cover your mistake right up, while adding another bit of visual interest!
*If you don't remember to mask the "nd" in "and" to make an "A," you can also work a little piece of cover up paper into your design and the recipient will never know the difference!


I love the way the plastic die cut adds some shine to my card. It was even shinier after I realized I'd left the protective plastic cover on it! Yeah, I noticed that after I'd glued all my layers down, tried to lift part of it back up, and tore the plastic. So I just took a deep breath, carefully lifted it apart, got the plastic off, and made a mental note not to do that again!
I hope you've enjoyed reading about how I spruced up my die cuts to make this lovely card, full of dimension. Now, hop on over to our new site, www.DieCutCrazy.com and comment on each blog for a chance to win that amazing layout from the Paper Wizard. Follow DieCutCrazy on facebook for even more inspiration, and tune back in to see my latest round of cards going out in the shops next week!
Enjoy...
xoxoAnna


Sunday, August 10, 2014

Let It Rain!


Do you have a theme song? I mean, is there a song that has been playing throughout your life that seems to come on the radio at just the right time, the lyrics of which echo parts of your life experiences? You know, the one that no matter what, you will be singing out loud the words too... ya, you know you're thinking of it right now!
Sometime within the last year I was on Shimelle.com and either read a post or watched a video of her talking about visiting the David Bowie exhibit at her local museum. Apparently he had saved so much of his early scribbling and assorted paraphernalia over his (50 year?) career that it needs exhibition status. Shimelle challenged us to scrapbook based on a song, or an artist that we really felt a connection with.
First song to come to mind? Prince and the Revolution's, Purple Rain.
 Yup, I'm a tried and true fan of THE Prince. Raised to want to fling my panties on stage even before I knew why anyone would be interested in doing something like that! Side note- I often wondered which day of the week pair I'd have thrown...
So, did I want to scrapbook about "maybe I'm just like my mother?" or "maybe I'm just like my father?" "Why do doves cry?" NO! I wanted to fit this song to the fun pictures I'd taken of my family picking plums over at my moms house last summer.
Purple rain, get it? lol, 'cause if you've ever had plum trees, or just fruit trees for that matter, you know that the ground is apt to get messy once the blossoms turn into those natural fruit gems.
I gathered many different shades of purple, my favorite color naturally, and then I envisioned lots of frilly looking cream colored paper reminiscent of those popular flouncy blouses men wore in the eighties. Honestly, what was up with the pirate look?! And even more honestly, were any of the men in your life wearing blouses? lol I only had eyes for Prince. I mean, when he showed up at the concert I saw two years ago wearing a caftan (of all the headwear he could have chosen!) with what I'm guessing was a cape- now that is a real man, folks!
The page on the left hand side was actually a pre-made deal, complete with torn paper layers, paper pieced multi-colored border, and sewing. I wanted to mimic that look on the right hand side and it turned out I had just enough shades of paper to work with. I love the way they look side by side, and although I added it after these photos were taken, I also added some stitching with my sewing machine to the bottom of the right hand side page as well. Ended up moving my sewing machine into an even more prominent location in my craft area, so we'll see if that helps me to use it as much as I desire too.
My best friend had met me for some scrapbooking and catching up at Michael's Saturday, and brought me like, the entire October Afternoon Witch Hazel line, including two sticker sheets! What a pal, huh? I wanted to try and incorporate something from that mass of goodness, and found the music notes border sticker to fit my theme perfectly. Not sure what the song actually is, but who cares right? I also made a witch into a garden fairy by adding a crown sticker over her pointy hat :-) I used some of the tab stickers for a four-photo flip up so I could include even more photos, and added a lot of my friend's washi tape in layers around the layout too.
When I think of Prince, I also think of Diamonds and Pearls- as embellishments! but, while neither of those items was seeming to be the right accessory, I did include the quote, "More Precious Than Pearls"- perfect for describing the bounty that God provides us each harvest, as well as the joy of feel watching my beautiful daughters, spending time with my family and enjoying the same activities I grew up doing. Certainly a precious enough idea to capture.
One last thought on scrapbooking: what about scrapping those terribly unflattering photos... my thought is, include them anyway lol! These pictures of Ray certainly don't capture him at his most handsome-est, but they are funny and I love how much Sunday looks like him in the photos we took. I used that little witch sticker to write out, "Is this Organic?" and then wrote in, "Was that from Safeway?!" The plum he's eating is freshly picked from the tree, but the quotes are a little inside joke that goes back to my step dad trying to pass non-organic food off on us by saying, it came from Safeway!
So what's your theme song, friend? Leave a comment below, and come back this Friday, August 15th, for a birthday blog hop sponsored by DieCutCrazy! Eric from the Paper Wizard will be giving away an uber-fun layout kit to one lucky hopper! 

Wednesday, August 6, 2014

Late Nights Finish Early In the Morning


Those late nights can lead to some really fun mornings! Staying up late scrappin' the night away is one of my greatest pleasures. Well, to be honest, it doesn't matter what time of day it is, if I'm scrapping, I'm happy! When I can finally make myself go to bed the wheels on my creative mind are continuing to roll, and sometimes it seems like I've just kept on working til the dawn's early light :-0
Not a bad experience!
In my last post, I showed you  the starts to three pages I worked on late Sunday night. Here are a few photo collages to show you a few of the additional finishing touches I've added before tucking them into bed (sheet protectors haha).
I did end up going with the title, "Annie get your Gun" on this single page layout to the left. I used a mix of different alphabets, including but not pictured, some old, patterned chipboard letters which happened to match the colors in the Glitz Design sticker banner perfectly. See how I added brads in between the "Love is a Gamble" banner, and then hung some Close To My Heart metal I-don't-know-what-they're-calleds embellished with tiny brown sparkles, and some knotted baker's twine for extra texture and a bit of whimsy.
My journaling is not hidden, but it's not meant for easy reading, either. Writing on a patterned paper background is a fabulous way to write what you want with less fear of judgement lol. The story I wanted to tell was how Ray came home with a new gun, which I promptly declared to have been bought for my own enjoyment. Or Zombie killing. Whatever comes my way. It's just an air rifle! The funny story that I'm internally implying through my sticker phrasing, is that a woman with a gun can be hard to leave... as in, don't even think about it, Mr.! That might explain the somewhat maniacal expression on my face?

I loved the simplistic but balanced appearance of the two pages I created using the Storytellers "Delightful" set of die cuts. Not much was added to either page, but it's all the little things that made me feel that they are complete. Little touches like the ribbon and ribbon slide behind the "Good" die cut, the sprinkle of tiny gems directly on a photo, the brad berries I created, as well as some journaling to tell the story of the photos.  I added some hidden journaling behind the top title block, and dressed up a tab die with some hand drawn fancy numbers for the date.
See those brads under the numbers? I did not add them, they are printed on the tab! Pretty easy to use embellishments that are dressed up for you beforehand! Hmmm, now that I think of it, these die cuts are inspiring me to add some brads to my next project...
Thanks for taking a look at how my late night scrapping turned out the following day... Don't forget to come back throughout the month to see how I'm incorporating my large stash of die cuts into my creations.
The latest edition of DieCutCrazy is available today and includes loads of inspiration as well! On the 15th, my fellow contributors and I are having a Birthday inspired BlogHop! Sounds like a prize will be available too, hip hip hooray!

Sunday, August 3, 2014

Anatomy of a Late Night Scrap Sesh


Late at night when the kids are in bed, I like to have Ray select a few photos for some "Scrapbook Starts." That's my little nickname for these pages I start and don't usually complete right away. You'll notice these examples are pretty basic... they'll be spruced up sometime today, but here's a peek into my late night creative process!
I generally start with the photo itself. Thinking of a basic title, or the story I want the photo to tell helps me get into the mood to gather my supplies. The chosen photo or story may also influence the colors or theme of papers I'm shopping my stash for. It really helps to take the photo to the paper stored in our craft room; you can pretty easily tell what "goes" (and doesn't ) by holding the photo up to a few selections. There can be surprise pairings of patterns that emerge as my creative engines begin to turn over!
Next, I reach for add-ons like stickers or die cuts that I may have thought of while looking at the photo or searching for a background. The way I have my embellishments stored makes this a really easy thought to page process. Check out this tour of my craft room for a glimpse at one of the ways I've had my space organized. I look for either matching colors, a theme that fits, a phrase to use as a title, or maybe just something shiny that needs to be used.
I recently overhauled my die cut storage system, and along with my August Product of the Month Challenge and wanting to use more of my old stuff up this year, I'm hereby announcing that my product of the month will be... Die Cuts! On August 15th my fellow contributors to DieCutCrazy and I will be hosting another Blog Hop, so watch for that! Last night I got into my circa 2009 Storytellers collections and chose this "Delightful" set that went well with the photos and papers I'd chosen. The great thing about their die cuts is that they already look layered and embellished, so sprucing them up is not actually needed, but very easy to do. See how I layered photo corners over those already on the background patterned paper above? And in the layout below, I simply added paper flowers, and used my exact-o knife to cut out a small part of the design to layer on top for added dimension. There were more than enough pieces to spread across two pages that will go side by side in my album, so I put the extras into a new kit, made from papers I'd thought of using but didn't. I  mean, why put them away when I can use them for another late night crop session?! 
So sometimes, on simple pages like those two, I can add a few finishing touches that bring them nearly to "enter the album" stage. Touches like the brads in the centers of the flowers, or the hand drawn blackberry vines with custom blended ink splatter berries. Touches like the eyelets on those punched circles, or inking the edges to make the white core disappear.
On the page to the right, I chose a package of Glitz Design's cardstock stickers to embellish my layout. You can see the page is still lacking- nothing is holding the banner together, there is no title or journaling, and frankly, it's hard to tell what the story behind my holding a large gun with a gleeful smile is. And guess what, it's totally okay that the page is incomplete! I fully intend to go back in and put those finishing touches on sometime today or later this week.
In the meantime, I may think of a much better title (although, "Annie Get Your Gun" will be hard tobeat), I may change the angle of the story I want to tell, or add variegated yarn instead of black twine as I intended... the choices are all still there, but I can make them in the my actual craft room,during daylight hours easier than late in front of the tv, on a card table set up by the sofa at night. On the other hand, I sometimes find that I'm really okay with how it looks and I just add a quick dash of fiber and journaling to get it in the album pronto. These simple pages add a different visual element to albums that can almost become monotonous in all their embellishments and details. As long as those pictures are getting printed and/or our stories are being told, there's no "wrong" way to scrapbook!
So theres a peek into my late night creative process... now you know why I'm posting photos of my work to facebook at 12:23 am! Let me know, how do you maximize your creative energy? Do you have a little routine that makes it easier to craft in a jiffy? Leave a comment below, mark your calendar for August 15th's DieCutCrazy blog hop, and as always, thanks for reading!

Tuesday, July 22, 2014

Way to washi no.722


Take a lot of coordinating colors of washi and use them to create a really cute card!
First I covered half of a blank card base with the light blue stars washi tape. Then I covered another piece of scrap cardstock, cut it into separate strips, punched each strip with the scallop border punch, and then layered them together over the ends of the first washi application. Finished with a lovely K & Company die cut and Jillibean soup label sticker. I felt it needed still something else, a query that is almost always solved by the addition of either bling or twine. Or both!
Thanks for stopping by! You can see this card in person by visiting the downtown Gig Harbor Copy It...Mail It! and I'm terrifically excited to announce that as of this afternoon, a few of my cards are available online through Etsy! I'll have more details about this coming out in the next few days. For now you can click on this link: www.etsy.com/shop/craftwithanna  and see what I've got up. Hooray for card sales!

Friday, July 11, 2014

ATC Ready to Win!

Artist Trading Cards- or Prize Winning tickets?
If you got one of these paper gems from myself or from The Paper Wizard's booth at the Puyallup Scrapbook Expo, or saw my post through facebook, instagram, or Twitter, and wound up here, you're in luck! Simply leave a comment below before July's end, and you could be a winner! Drawn at random from a hat, the recipient may choose from either a card or scrapbook layout made by me, and I will mail it out pronto. As promised in my last post, your envelope will be beautifully decorated as well.
Your prize inside will feature a multi-layer die cut. Don't know what a die cut is? or perhaps looking for some inspiration on how to use them? Take a look at the latest edition of DieCutCrazy, a digital magazine full of terrific tutorials, product reviews, and tons of photos of projects from around the world. All for just 0.99! Search for it in your Apple store or just click here.
    The last giveaway I had was for a YouTube milestone, so if you want a bonus entry, subscribe there to my CraftWithAnna channel. Click on the Process Videos tab above for more of my 'tube-ular If you'd like to follow my blog I'd appreciate that as well.
I'm honored you dropped my blog today, and look forward to our drawings end!
-Anna

Tuesday, June 10, 2014

Faux Copic Marker Coloring


Today is my younger brother's birthday, and I'm sharing with you the techniques I used to make this adorable card for him. DIeCutCrazy has added some new contributors, and one of my new peeps, Deepti, recently shared a card made with a little monster. I had to grab an old set from CloseToMyHeart that NEVER gets used. Now, I'm in love! 
My little brother is a lot bigger than me, now. I laugh a little whenever we are introducing each other, becuase he literally towers over my 5'3" short self. But to me, he'll always be little, and he'll always be the monster that irritated me to no end as a teenager. Fortunately, I now realize there isn't anything that doesn't irritate a teenager, and I've learned to respect him and admire the man he's grown to be the last decade.
For my first technique, let me tell you how I gave my little monster such depth. I've been watching a lot of copic marker coloring tutorials, (even though I don't have any!) and decided to try my colored pencils at creating a similar 3D color look. Start by stamping your image in a light color. With your lightest color desired, lightly color in the entire image where applicable. For me, this was the light pink body of my space buddy. Now, grab a watercolor pen and, with small circular strokes, blend the color until it looks smooth.
Next you'll want to go for your darker colors. I chose to go for the darkest shading color of the dark purple in the creases and shadowy places. Again, blend with the watercolor pencil. Then fill in and blend with your mid tones, repeat until your are pleased with how it looks. Accent areas can be colored and blended with less color applications if you desire. I guess it depends on the sharpness of your pencils, or how many colors you have!
My brother is such an amazing guy. He can find the silver lining in any situation, he's a terrific friend and coworker, is always willing to lend a hand when he can, is a terrifically loving uncle, and in our house, is known as "the perfect movie date EVER," much to my honey's chagrin.
 For an out of this world effect in the background, I stamped stars with clear versamark ink, then heat embossed them with clear powder before painting over with some regular blue crayola watercolor paint. To acheive a constellation effect, I sprinkled salt on the wet paint! Once dry, I just brushed it off. Try layering a dab or two of another paint color over the salt for a really cool spacey look.
As I mentioned before, my brother's influence on me has taken on nicer significance the older we get. He taught me to share, how to recognize when winning is more important to another, and how to fart on command. Well, I never really got the hang of the last one... But who would I have been able to take out my teenage angst on? Who would I have screamed, "Get out of my ROOM!" at all those times, my parents? yeah right. 
On the other hand, who would have accompanied me on all those unapproved drives to go swimming with my friends, who would have lived with me for years (and never asked me to clean my room),  who would have taught me that family can be friends too? I remember vividly the day we brought him home from the hospital. In retrospect, my life changed for the better, and our household dynamic was made even stronger. 
To make your image really pop after all the color treatments, stamp over the image again with a darker ink, or for a more subtle look, use the light color you started with. Clear stamps make this really easy to do, but you can use a stamp-a-ma-jig or other stamp positioner too.  I even colored in the speech bubble and the monster's eyes with a white pen to make them extra bright, then went back with my colored pencil to darken the pupils.
On the back panel of purple paper, I stamped a repeated  calendar image. Then I overlapped that back panel and the card with a die cut star, to bring the layers together. My cropodile punched out the little circles from a multi-colored polka dot print by SEI. Here's a tip: apply little dots of glue where you want your small dots to go, and you won't end up with glue all over your hands. Or at least not as much glue :-) You can put all the glue down at once like I did, but I recommend doing it one dot at a time if you're a little more fastidious. 
My brother is really one of my best friends, and my life would be seriously lacking if I didn't have him around to bring a smile to our faces on a regular basis. A simple Happy Birthday stamp on the inside doesn't express that, but my happy little monster can hint at what a delight he is to have around, as he is pretty smile-inducing too. I hope you enjoyed some of the techniques I shared today, and feel inspired to try them yourself!
Happy Birthday, Jeremy!

Saturday, June 7, 2014

Back in the Backyard -Crafting!

Little Photo Sesh Outside the Library
Once the weather in Western Washington decides to get summery, it is so hard to stay indoors. Even going to the library is a reluctant venture, because we just love getting all that delicious vitamin D!
Oh yeah, this is the Life!
A crafty gal like me won't let the call of the great outdoors get in the way of creating every day, so I just move outside to the backyard :-) Rainier has gotten pretty mobile with her supplies as well and its a real joy to be whipping up projects in a creative frenzy together.
Here's a chance for you to craft with me,
Congrats, Grads! #PHSalumni
I had such a great time creating that elegant looking card with common junk drawer paraphenilia. If you've got the inclination, a search on instagram (see my social media icons to the right) for #DCCrestlye will bring you some interesting imagery.
Graduation is just around the corner for many... think back on how you might have felt at a similiar time of accomplishment in your life, and channel that energy into a thoughtful, handmade gesture for someone.
If you're looking for some new or inspiring ways to use your die- cuts, check out the latest edition of DieCutCrazy, a digital source of delight!
I hope you enjoyed my video, and go rummaging about for your own  re purposeful items-
Now....
Get Crafty!


PS It has been some time since I was able to put up a movie on YouTube...hit that subscribe button and you'll see my latest uploads upon sign in :-) Suscribe to this blog and follow along on all my (published) CraftWithAnna-dventures!

Friday, June 6, 2014

Six by Six Series: Episode Two


I'm back today sharing some more from my Six by Six series, all about how to use those awesome miniature versions of our favorite paper collections.
A simple square torn right from the pad makes a great background- as long as your photo is smaller than 4x6... but this idea can be easily interpreted and used for a piece of paper that is about 8x8 inches.
 I have a lot of these because I'm a paper hoarder and often times will cut the back out of my scrapbook pages. What I mean is, that when I'm only using a sheet as the very background layer and the middle will be covered, I just cut that part out. I generally cut in about two or three inches all the way around from my 12 inch sized patterns, leaving me with about a 9x9 or 8x8 square to use on another project.
I'm bad! I even do it for really small pieces of paper. There is something about a beautiful print that gets to my paper cutting heart :-) So what then do I do with those tiny scraps of paper? Well, I've been known on (only) one occasion to go through them all and donate them, but I love to incorporate them somehow.
What I've been doing a lot lately is using them in little border clusters.  A couple strips of paper from the same 6x6 paper pad can help to balance the page, and of course the colors go effortlessly together.
See how I layered a couple pieces behind the top of the green photo mat, as well as under the title block?Check out the bottom left and top right hand corners of this page. This is a fun and funky way to bring some color to the corners of your pages and help the eye travel around.
For more funk, add in a sheet with similar colors from an entirely different collection. You can't tell, but this soft pink on cream is actually from Christmas collection!
If you are having trouble matching cream and white colors together, a simple swipe of ink on the edges will make it easier for the colors to blend together. The ink works really well at distracting the eye from "clashing" colors. Try it on an outfit soon!

I'm off to the library to upload a new video, creating a special card for the grad in your life with items from around the house. So come back and check it out!
I hope you're enjoying this series- I'd love to get your feedback through a comment! & Happy Crafting!

Friday, May 16, 2014

Six by Six Series- Episode IV: Smile

Remember when the Stars Wars series renewed itself by starting its saga all over again with prequels, leaving you wondering how will this all lead up to what I already know?! Well this series won't be filled with laser guns and jet planes, but there will be a love story and maybe even some hairy animals!
I've got about four six by six paper pads that I've been experimenting with including on my scrapbook pages and card fronts. I'm seeing other designers incorporating these miniature patterned  papers in their projects too, and hope you'll share with me in the fun of training our brains to reach for them too.
6x6 patterned papers, and 8x8 for that matter, come in a down-sized version, making them ideal for including in cardmaking, but I find that really helps to makes them more neutral when adding them to a background in scrapbooking, too. Their size is perfect for creating a quick grid of four sheets to equal 12 inches all around. If, like me, you tear a page a bit in your haste to rip it from the binding, just think of that whoops as a reminder that these papers would like a scrap piece or background underneath them. Trim off -or maybe enhance - the torn edge and you'll end up with a crisp little border frame on your page.
When selecting my prints for this layout, I looked for four busy designs with background colors going from light to dark. The little miniature cut-apart sheet provided me with some coordinated title pieces, and I used a couple of circle punches on the starbursts print for some simple confetti-like sprinkles. My Minds Eye papers are generally cream based designs, and for the journaling space I needed a really neutral piece, preferably with lines to write on. I remember using the full size version of one of the papers in a layout I made last year, and turned it over to find the same grid which would be perfect. You can see the full-size version layout here:

Have you ever experienced the rhapsody of pre-breakfast scrappin'? I spent Wednesday night at my moms house and she had that lovely 8.5"x11" enlargement of Grandma and little sister waiting to show me. Isn't this a beautiful print? It was taken last Friday while visiting with our cousin Paulette from Arizona- Hi Cousin!!!  I love that simply looking at the photo leads to a grin on my face.
While the girls ate breakfast and did a little crafting of their own, I whipped this together in less than 20 minutes. Now that's a habit that could use reinforcing! 
Thanks for stopping by my blog today. Check back throughout the week as I share the prequel pages in my six by six series, and if you happen to be at the craft store, investigate those handy pads of miniature designer papers!

Friday, May 2, 2014

Anna Griffin Cuttlebug Collection


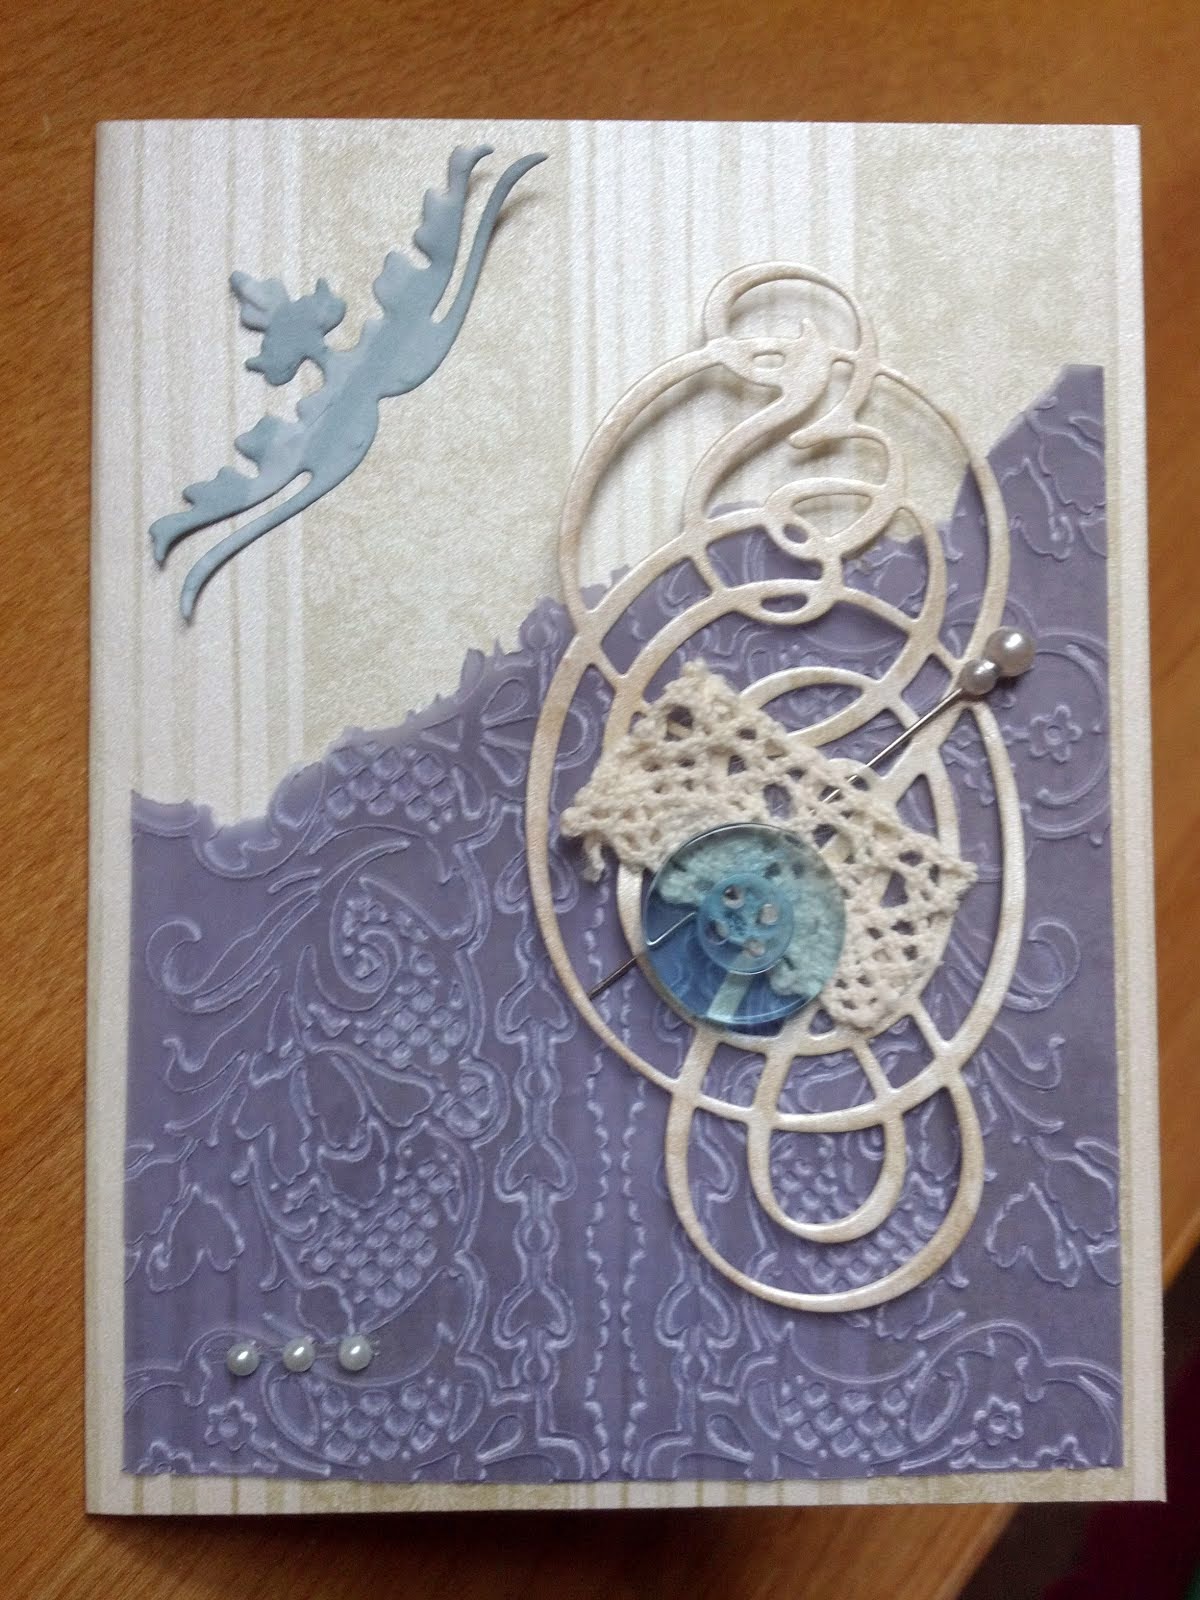
Earlier today my friend Ginger came over with her gorgeous, Anna Griffin GOLD toned Cuttlebug, and the dies and embossing folders she got as add ons in a QVC special. How fun!
I was so "impressed" with the embossing folders on vellum and the different textured cardstocks of various weights we tried out.
The two of us giggled the afternoon away and managed to put together five cards which Ill be featuring in next months issue of DieCutCrazy. Not a bad way to get into craft mode for National Scrapbook Day tomorrow!
Sent from my Verizon Wireless 4GLTE Phone

Monday, April 7, 2014

Scrapbooking "Off the Grid"


I love it when I see a magazine feature or advertisement or card in a shop that inspires me, don't you? Picked up some "vintage" scrapbooking magazines from a friend last week and yesterday afternoon a layout featuring a grid of 16 squares with rounded corners caught my eye. Funny, this layout was actually a lift of another scrapper's layout! So I guess its a pretty good design in terms of its adaptability.
On my desk's to do list this last week has been some photos taken last December, over at my wine-loving friend Becca's. Every year she bakes, like, a hundred cookies and her family decorates them all in one night. This is like a dream event for me! But how could I go and leave my little ones both at home... we don't exactly promote sugar ingestion in our home, but this is the kind of traditional holiday gathering that I grew up with.
Rainier and I met my mom over at Becca's and ended up bringing our own cookie dough along for the fun. Delicious, healthy, and easy to make, these cookies even appeal to regular cookie eaters :-0 Just take a banana, mix it with some nut butter, oatmeal, a dash of vanilla and I think that's it! You can add cocoa for extra yum. There may be more to it, I haven't made them since December so I'm a bit mucky on the particulars.
Sprinkles of raisins, currants, and almond slivers had my toddler in decorating heaven along with the other kids there that night. Including some very large kids home from college, haha! I was feeling very MOM like, with my glass of wine, overlooking all the festivities... but you know as soon as a seat opened up, it was ON for me to get my sprinkle on! I felt kind of bad because we wouldn't be eating them, but we thought of a great way to pass on the goodness; send them for fellowship after church the next day :-)
Matting my photos really helped them to stand out against a very busy background. Adding some cooking themed stickers for embellishment made the layout a lot less serious and I was able to pass on the few not used for Rainier to use on her own project. You'll be able to see this entire layout, with a cool use of a negative die cut, in the next issue of DieCutCrazy.
Can't wait that long for some die cutting inspiration? Check out the April edition, now available on your Apple device and as a PDF as well! And, you can see another grid style scrapbook layout opposite this page:

Wednesday, April 2, 2014

Charisma Cardz Meets Die Cut Crazy Blog Hop


Welcome to the Charisma Cardz Meets Die Cut Crazy Special Challenge & Blog Hop. The incredible design team at UK's Charisma Cardz have this week teamed up with my peers at Die Cut Crazy to bring you some wonderful inspiration from the world of Die Cutting, as well as a fab packed April Edition which is available for download on all IOS Apple Devices via the Newstand & in PDF format from the website. We've been hard at work creating beautiful Easter and Spring projects to inspire your own crafting with your die cuts.

This week at Charisma they have an ‘ANYTHING GOES’ Challenge where you can join in by linking or emailing Charisma with your cards/designs- and of course as always there are some fabulous prizes to be won! The  winners will be announced next week on the blog, AND featured in next months issue of Die Cut Crazy. Fame awaits you!
As well as this we have a spring influenced blog hop, showcasing all the designers. You should have a look around! For each comment you leave at each stop we’ll be drawing some random winners for prizes. This could be YOU...
If you just joined our hop, be sure and go back to the 
Charisma Cardz Challenge Blog to start from the beginning! But first, my little Spring Fling Mini-Album!


Ah, Spring...there's just nothing like the feeling of the earth stretching towards the sun all around you, is there? There's also nothing like the feeling in your legs and back after a full day of gardening, which, lets face it, usually is just weed pulling with a nicer name!

You may have guessed, I'd much rather be creating with paper die cuts next to a window than sowing seeds out in the sun! What's a crafty girl to do? In a few months I'll drag a used bassinet outside and soak up the sun. This table is just the right height and has a bit of wind protection around the top edge, making it perfect for outdoor crafting! 
As the days get longer and the rain falls less often in our state, we approach the most beautiful weather of the year. You can see that trend reflected in many online mood boards and in our favorite YouTube crafters too.


In the spirit of following my own passions while honoring the traditions of another, I chose to create a custom seed collector for the master gardener in my life, my mom!


I found the idea for this fun mini-album on the Score-Pal blog. It was really easy to put together and even easier to customize. What really makes this mini ideal for seed collectors are the tabs that slide in and out of the pages- ideal places for envelopes holding a bounty of beauty waiting to burst from the ground!

The base of my pages is the "B" side -or maybe it's the "A" side, I can never figure out how that works- of a beautiful soft pink, DearLizzy's Neapolitan: Delightful Bouquet 12x12 sheet.
 As the name suggests, a delightful bouquet is indeed on the reverse and helped me to pull and mix in colors for my project, like Heidi Swapp's Primrose Color Shine Mist.
Here's a fun idea I recently shared here on my blog: next time you have a few extra holes punched out, cover them with some Liquid Glass or another clear-drying hard glue. Let them dry overnight, and you'll wake up to your own custom enamel dots!Sprinkle amongst ink splatters and enjoy the bling!

Me & My Big Ideas die cut notecards, some generic small manilla envelopes, layered with Graphic 45's Secret Garden die cut tags and pockets made every page pop with a little bit of unique, and then I tied on an orange ombre ribbon to close it all up.
No, I may not have a green thumb; instead, I possess have a tombow mono-ink splattered thumb that can tie a mean bow tie! Let's see your next die cut covered mini; just tag it on instagram or Twitter with #DCCMini, and you may see your creation in next month's issue!


 Thanks for stopping by the Charisma Cardz Meets Die Cut Crazy Magazine Blog Hop & Challenge! I hope seeing my project leads you to create your own Spring/Easter piece.  Please leave a comment to let me know you stopped by, I love to read those comments!
 Next up in the hop is Eemeli. Enjoy!

In case you just joined the hop at my site, here are the other bloggers to hop about for inspiration:
You are Here -->--->Anna Bradshaw - craftwithanna.blogspot.com
Going on to Eemeli's site--> –> www.eemelike.blogspot.com
Stacey – www. lasatas.blogspot.co.uk/
Emma Pountney – http://tinyurl.com/m42q998
Dianne Grayson's work will be featured on Die Cut Crazy's home site! Get your copy of April's issue on your IPad. You will see MANY ways to use your die cutting equipment to produce incredible works of art. I've been inspired again and again by my peers manipulation of die cuts. Some styles are whimsical, like fairies, cartoon like stamping and paper piecing, or animals. Lacy borders and doilies seem to be another beautifully textured inclusion. "Add feathers, and voila it's Fans-chy!" As my daughter Rainie would say :-*. I love making a few little deluxe paper animals with my cricut and a lent Pooh Bear cartridge- thanks DF!
Don't forget, instagram #DCCmini to show off your die cut mini album!


Monday, March 10, 2014

Wait! Don't throw that away?


I admit, I have a problem throwing away little bits of pretty paper. So I'm not surprised that I was inspired to create my own version of enamel dots with this tiny punched circle from a cricut cut tag I used.


It doesn't look like much, but you wouldn't believe how proud I am of this little shiny dot and it's friends!


They were really easy to make, I just  added a blob of Close To My Heart's Liquid Glass to the top and let it dry overnight on a shred of wax paper. I wanted to be sure it was really dry before I touched it because sometimes I get over eager and ruin things!


This isn't a project I would necessarily recommend, as it was a tad tricky getting the paper to come off the glue tip without spreading sticky all over the place, but it was fun, and now I know how to make a very coordinated little blingie for any layout that "needs" it. And since you bothered stopping by today, now you do too!

Thursday, March 6, 2014

No one in the World...


You may recall seeing the kit for this layout in my Special Edition: Packing for a Crop videos. The SEI flocked background was out of my comfort zone, but I think you'll agree, it really pops without competing!

I added a Glitz Designs sticker (thanks Cruise and Crop) as well as a Basic Grey brad (Big Lots, Ill be back!) to a globe die cut for a simple little anchoring embellishment cluster.
You know Im (a horder) into recycling and repurpousing... take a look at your packaging materials like I did for the fussy cut flower group on the left hand side.
A long title and a long row of bling, a journalling card cut in half to stretch behind my photos, and pictures of a little girl who makes my heart sing... I gotta say, love how it turned out! But...
Where are the stamps?
Heh heh gotta get crackin on incorporating my March theme product :-) pretty good reason to craft today, dontcha think?