The last few years, at the close of the Creating Keepsakes Convention, I've drawn the winning name for a prize from one of my favorite vendors, Queen & Co.! This year is no different, and there are quite a few ways to win.
You can subscribe to this blog. Doing so will get you emailed versions of all my blog posts- so you never miss a chance to CraftWithAnna!
You can subscribe to my YouTube channel, which is just a purple icon click away- look for that on the right hand side of this page with other social media icons. Instagram follower yet? That will get you an entry too!
You can also comment on any of my recent videos, including the one that hit YouTube TODAY- the November scrapbooking layouts from EmbellishKits.com.
Or, you can comment on this blog post. I loved hearing from a follower at the convention this year!
With so many ways to win, I bet you're wondering what the prize is... well all I will say is, it's going to be some bangin' bling bling baby (the contest name is Queen of Bling)!

Showing posts with label buttons. Show all posts
Showing posts with label buttons. Show all posts
Friday, November 20, 2015


Monday, October 26, 2015
EmbellishKits.com August Card Create A Kit!
Wedding cards are always good to have on hand, but it seems like mine always say "Mr. & Mrs." and not much more. This kit from EmbellishKit.com fills the gap in my stash of smoochy supplies with the beautiful Simple Stories collection, The Story of Us. Dreamy!
Thursday, September 24, 2015
Finishing Touches for Fall
 Here's another page I've made recently using a photo of Rainier dressed for the outside. It must have been taken in the beginning of Spring. She's got on a knit cap made by my Aunt's mom... it's so nice to have a warm cap of love to top off an outfit!
The theme of this post concerns my ongoing trials in journaling and title creating...and as the Virginia Slims of the past proclaimed, I've come a long way, baby! You can see that the layout was completely perfect as it was in the top photo. But it really comes alive when the sentiments are added, as you can see in the photo below. Like the hat Rainie wears, the difference is not overly obvious. She could just as easily be wearing something from Target. My page could just as easily have been included in an album sans additional embellishments.
What area of scrapbooking could you leave out of the creative process and not miss too much?
I would usually choose to avoid the finishing part. The thinking of what to say. The figuring out a summarizing phrase that invites further reading into the story of the photo. The finishing touches that sometimes seem to take away from instead of adding to the over all theme of the project.

I would still be satisfied, but would future generations, or even those reading through my albums now, be able to read between layers of pretty paper to find the reasons why I put these particular photos in between plastic sleeves of protection? I don't think so. And that is why, despite my underlying reluctance to share, the heartfelt sentiments I feel so passionately end up on show. I do it for "them." And me. And even you :-)
Just like that warm cap on her head, the journaling and title contain the warmth, show my love in written form, and invite the reader to participate in the art of story telling. Just as winter's chill brings on the extra accessories of coat, hat, and scarf, these words add a layer of love to my albums. And that, I can not do without...
As the weather changes, the boots and sweaters, knit scarves and caps come out, take a moment to add an additional layer of sentiment to your next scrapbook page or creative project- and yes cooking counts as being creative (I've been told)!
Warm thanks for stopping by today!
Monday, September 7, 2015
Birthday Card Bonanza
Just had to share these coordinating birthday cards my family created this morning. My cousins son is celebrating his ninth birthday at a football themed party this afternoon. With a couple dollars tucked inside, I'm sure he'll appreciate these even more :-)

Her card at top left is turned out so great- I love her use of the sticker at the bottom, the tilt of the vellum birthday cake, and washi tape border with twined buttons layered at the top. Rainie has learned how to interpret the designs of cards she likes pictured in magazines... a great skill for getting past that sometimes monumental task of deciding, What To Make? How many times have we let that question stump us huh?
For my card with the purple background, I turned to a design I use often- that look of a polaroid photo through matting. I then had the amusing idea to place a square of matted football print paper over a background image of one of those persons. By mounting that scrap in the place of a belly, I was able to tie in with my sentiment inside about not knowing what the future will bring when we hold our children within. This card is for Lil B's mom and dad; I think the parents need to be honored for their dedication to their children as opposed to the kids getting a prize for staying alive another year lol. Both can be considered feats of accomplishment though, of course!
Now we're off to pick up my grandma, who the kids call GG- great grandma :-) She's really excited to join us for the festivities. Getting older, giving up her car, becoming more forgetful... as we celebrate the advncement in age for one member of our family, we remember that she is traveling cautiously but continuously down the other end of that road we call Life. We cherish the times we can spend with each other so much, I know this day ahead will contain fits giggling, barely contained joy, and a lot of hand holding hopefully.
Enjoy your day of Labor free loving!
Tuesday, May 12, 2015
May 2015 Card Share for EmbellishKits.com!

It took me a few days to get my video made- instead of my usual craft submersion this weekend I instead participated in the creation of some terrific Mother's Day memories - go figure! I laughed to myself throughout the day because usually I take this day off from any caretaking activities, child related or otherwise. For some reason though I kept washing dishes and comforting the kids- so maybe I'm maturing in my motherly way lol.
My brother came over in the morning and helped us set up a playset one of Ray's clients gifted us last fall. I somehow managed to convince him that the best place for them to play would be directly across from my craft room window... so yes, I will need to spend even more time in there, "supervising!" Later in the day my mom and her husband came over and we enjoyed a lovely afternoon, complete with BBQ and a long distance chat with my step-sister in Germany. I couldn't help but show off my seedlings- but did not mention the crop of aphids I discovered hiding in all my kale. YECH!
But back to the showing off- you're here, you know I love to do it so here it is without further ado:
My brother came over in the morning and helped us set up a playset one of Ray's clients gifted us last fall. I somehow managed to convince him that the best place for them to play would be directly across from my craft room window... so yes, I will need to spend even more time in there, "supervising!" Later in the day my mom and her husband came over and we enjoyed a lovely afternoon, complete with BBQ and a long distance chat with my step-sister in Germany. I couldn't help but show off my seedlings- but did not mention the crop of aphids I discovered hiding in all my kale. YECH!
But back to the showing off- you're here, you know I love to do it so here it is without further ado:
We certainly hope you are enjoying these kit preview and share videos! Show your support with a big thumbs up and tell a friend what they're missing- inspiration, ideas, and non-intentional impersonations of Rachel Ray by yours truly :-)
Thanks again for following!
Friday, April 10, 2015
April EmbellishKits.com Card Kit Completed and the Best Ever Bonus Projects!
 |
| Limitless Creative Optins enclosed in the April 2015 card kit from EmbellishKits.com |
Oh Boy, when I opened my package from Shelby at Embellish It! and saw the April Kit Club inside, my heart skipped a beat at the amount of Spring colored happiness contained within. As I showed in this month's Review, the Wild Berry Jubilee collection from My Mind's Eye features a mix of soft coral reds, bright fuchsia pink, juniper and lime greens against a startling black.
Bold tribal patterns and delicate florals offer a contrast that I found easy to mix and match, and it wasn't long before all eight cards in my EmbellishKits.com April 2015 Card Kit were complete. The hardest part was not keeping them all as art! I could easily imagine a few of them in small black frames highlighting my entryway.
Let's start with card number one, "Today- Best Day Ever." As you could see in the video, there were definitely some die cuts that would change the look and sentiment of this card with minimal effort. And, if you make a boo-boo when following directions, a little washi can go a long way!
Next up was a card that I took a few more liberties with. The graffiti paper used in the "Graffiti Floral" card was speaking to my scrapbooking side. So many of the sentiments echoed the memories I brought back from my recent trip to Tenamaxtlan, Mexico. If you've been following along on my blog, or care to go back and read my musings, you'll now that my father accompanied me and showed me a lot of the surrounding area, including different plots of cattle grazing land he owns. As I searched through the die cut ephemera pack included with this kit for those large tropical flowers, I happened upon those photo frames. One is empty and the other shows a prairie- like scene that was perfect for this thank you card I ended up creating. I have found that men do enjoy receiving cards, but you know how a stoic man reacts when a little emotion is thrown at them, so I chose the slightly distressed soft coral solid to contrast with the Bazzil black cardstock base and tribal border. Now that "sweet" little die cut sentiment just blends right in. Don't you love how the black shows through behind the flowers, too? I continued the contrasting theme inside as well by using my white gel pen to express my gratefulness at such an emotionally impacting trip south.
On a brighter note, I've begun sending my cards via text and facebook messenger images! Sometimes you just want to say "Hello," and this 6x6" turquoise blue Bazzil backed card is a super-sized way to do so.
Take a closer look at that strip of green and you'll realize it's a little translucent. That's because it's not made with the suggested strip of paper, it's the same washi tape I used in the review video! Click on the word "washi" in the search column to the right for more ways to use this cool tool.
Since I'd used that "beautiful" die cut on my TeneMeme card, I chose the tribal diamond strip instead. A little snip on one side makes this small piece appear to stretch across the entire card front now. I put some foam adhesive under the hello square for some extra pop against that busy background. But I didn't stop there... oh no, I brought the party to the inside too! A card this big can be a little intimidating to fill, and this side piece will nicely contain a moderate amount of wording and still cover the card space.
You know, I used to write for an awesome magazine called DieCutCrazy, and working with all these die cuts, pulling them in and out of the package, and trying to keep all those tiny pieces together was making me feel a little reminiscent of those days, so I decided to go all out and create my own card front filling design based on the example photo for card number four, "So Cute."
It may be a little difficult for you to find my card at the bottom left here, just click on any of the images here on my blog and they will appear in a larger window. Go ahead, click and come back. Or, read, and then click, and then come back lol.
I used 15+ pieces! As if all that pattern wasn't busy enough, I added a sprinkle of green glitter ink splatters too. It was really liberating, playing with the shapes, and once I had my basic grid down, layering the hearts, circles, and that lovely flower on the top put me in such a festive mood that I decided this card could be for a birthday, or maybe for a gardener's baby!
I already shared a bit about my trip to Mexico, but maybe you didn't go and read that the reason for my trip was to visit my nearly 97 year old grandmother, Balvina. I have always wanted to see her again (last time was literally a life time ago- mine!) but it was mi Tia Natividad who sent me my grandmother's love in letter form so many times over the last couple of years. I know that she and her son read a lot of my postings here, but she needs a special thank you card. I grounded the typewriter on a piece of woodgrain washi tape, selected an Anna-appropriate sentiment and made it appear to be coming from the paper spool. My baker's twine travelled up to the top right and is also layered on a strip of leftover floral print. The addition of an airplane motif flair badge from Queen & Co. to card number 5, "Oh My!" makes this the perfect way to send a story of happiness and my thanks for her encouragement. The stickers, twine, and buttons you see embellishing these cards all came in this month's kit as well!
 Did you know that I have a second video cardmaking tutorial for this month's kit? Click on the Mr. and Mrs. card here and a new window will pop up for your viewing pleasure. On a side note/afterthought, this would be a great card for a Mr. & Mr. or Mrs. & Mrs. too :-) You know, I could have used that "Love" rub for the inside greeting on this card, but instead, it went on another project!
As I mentioned in the video, I try not to measure as much as possible when I'm in "the zone." I have to admit there are times when a ruler does come in handy, though, like when you are planning to use one piece of paper multiple ways. The first card and this card share that paint brush stroked background, and the instruction sheets included with each of embellish it's! kits contain all those hand cutting guides to let us know precisely where to cut. Score!

Card number seven, "You + Me," is so cute, the only change I made was to the orientation, from portrait to landscape. Well, I guess that wasn't the ONLY thing different, I also added those rub on heart shapes and an enamel dot to bring the focus to the sentiment. Here's a fun trick you can try; add some depth to your circular die cuts by punching the middle out and adding a pop dot to the back. POW! Now that's a blue ribbon embellishment!
 By the time I got to the last card for this kit, I was feeling so much of that bright and cheery fun from all that color. This set of brightly colored greetings wouldn't be complete without a congratulatory "Awesome!" After all, what comes along before the traditional summer wedding season? Graduations!
These multi-colored shapes remind me of the Volcom logo, so I geared this card towards a skate boarding teen. If you're ever in a creative rut, try visualizing a stereotypical recipient or viewer, and then work on incorporating elements that that imaginary person would enjoy.
 Isn't this card rad, man? The rub on really does most of the work for me, it even included ink splatters, so my fingers stayed clean. Our full-color example shows the same button and black twine combo popping against all those angles in the background. I substituted an trimming of the turquoise blue Bazzill cardstock in place of the black triangles print, add some enamel dots in an assortment of the same colors shown in the background, and then dug into my alphabet stash for the canvas u, R, and the smooth white asterisk thicker. Then I messaged it over to a friend I made on my cruise last month, because, new friends are Awesome!
I'm going to make a judgment call here and say that this blog post didn't take long enough to load... in other words, here are some more pictures!
Bold tribal patterns and delicate florals offer a contrast that I found easy to mix and match, and it wasn't long before all eight cards in my EmbellishKits.com April 2015 Card Kit were complete. The hardest part was not keeping them all as art! I could easily imagine a few of them in small black frames highlighting my entryway.
 |
| Today- Best Day Ever Birthay |
Let's start with card number one, "Today- Best Day Ever." As you could see in the video, there were definitely some die cuts that would change the look and sentiment of this card with minimal effort. And, if you make a boo-boo when following directions, a little washi can go a long way!
 |
| Graffiti Floral Thank You |
 |
| Hello Card for a Friend |
Take a closer look at that strip of green and you'll realize it's a little translucent. That's because it's not made with the suggested strip of paper, it's the same washi tape I used in the review video! Click on the word "washi" in the search column to the right for more ways to use this cool tool.
Since I'd used that "beautiful" die cut on my TeneMeme card, I chose the tribal diamond strip instead. A little snip on one side makes this small piece appear to stretch across the entire card front now. I put some foam adhesive under the hello square for some extra pop against that busy background. But I didn't stop there... oh no, I brought the party to the inside too! A card this big can be a little intimidating to fill, and this side piece will nicely contain a moderate amount of wording and still cover the card space.
 |
| So Cute Birthday |
It may be a little difficult for you to find my card at the bottom left here, just click on any of the images here on my blog and they will appear in a larger window. Go ahead, click and come back. Or, read, and then click, and then come back lol.
I used 15+ pieces! As if all that pattern wasn't busy enough, I added a sprinkle of green glitter ink splatters too. It was really liberating, playing with the shapes, and once I had my basic grid down, layering the hearts, circles, and that lovely flower on the top put me in such a festive mood that I decided this card could be for a birthday, or maybe for a gardener's baby!
 |
| Oh My Thank You/Hello |
 Did you know that I have a second video cardmaking tutorial for this month's kit? Click on the Mr. and Mrs. card here and a new window will pop up for your viewing pleasure. On a side note/afterthought, this would be a great card for a Mr. & Mr. or Mrs. & Mrs. too :-) You know, I could have used that "Love" rub for the inside greeting on this card, but instead, it went on another project!
As I mentioned in the video, I try not to measure as much as possible when I'm in "the zone." I have to admit there are times when a ruler does come in handy, though, like when you are planning to use one piece of paper multiple ways. The first card and this card share that paint brush stroked background, and the instruction sheets included with each of embellish it's! kits contain all those hand cutting guides to let us know precisely where to cut. Score!

Card number seven, "You + Me," is so cute, the only change I made was to the orientation, from portrait to landscape. Well, I guess that wasn't the ONLY thing different, I also added those rub on heart shapes and an enamel dot to bring the focus to the sentiment. Here's a fun trick you can try; add some depth to your circular die cuts by punching the middle out and adding a pop dot to the back. POW! Now that's a blue ribbon embellishment!
 By the time I got to the last card for this kit, I was feeling so much of that bright and cheery fun from all that color. This set of brightly colored greetings wouldn't be complete without a congratulatory "Awesome!" After all, what comes along before the traditional summer wedding season? Graduations!
 These multi-colored shapes remind me of the Volcom logo, so I geared this card towards a skate boarding teen. If you're ever in a creative rut, try visualizing a stereotypical recipient or viewer, and then work on incorporating elements that that imaginary person would enjoy.
 Isn't this card rad, man? The rub on really does most of the work for me, it even included ink splatters, so my fingers stayed clean. Our full-color example shows the same button and black twine combo popping against all those angles in the background. I substituted an trimming of the turquoise blue Bazzill cardstock in place of the black triangles print, add some enamel dots in an assortment of the same colors shown in the background, and then dug into my alphabet stash for the canvas u, R, and the smooth white asterisk thicker. Then I messaged it over to a friend I made on my cruise last month, because, new friends are Awesome!
I'm going to make a judgment call here and say that this blog post didn't take long enough to load... in other words, here are some more pictures!


With just a few additional patterns pulled from my extensive paper stash, I used a lot of my left over kit pieces to capture the visual flavors of that family reunion I had just experienced. As mentioned above, the graffiti print paper held many sentiments I could use, "on this day" for the morning my sister, grandmother, and I enjoyed prepping lunch together. It may have been a once in a life time opportunity (but I sure hope not)! "Having A Blast" for the afternoon my father and I watched a volcano erupt before our matching brown cattle-ropin' eyes. "Remember the Good Times" for another first- mi Tio Gonzalo y mi Tia Carmen embracing in la concina de mi abuela. And "You are the Best" for a gorgeous close up of my grandmother's ancient, wizened face. She really was as sweet as could be!
Pocket pages can be a fun way to enclose a lot of pictures in just a pages. I have found that if I photo collage a few groupings, I can get an entire weeks worth of memories captured in just a few moments. But of course, coordinated papers and embellishments like the ones in this month's card kit from embellish it! make it all very easy as well. Thanks for joining me for this month's card share post from the April 2015 card kit from EmbellishKits.com.
Watch the video version, and subscribe here on the blog if you're not doing so already...It's always a joy for me to have you stopping by to CraftWithAnna!
Sunday, February 15, 2015
Waiting in the Sun

 All this year our weather has been unseasonable warm, which feels great but of course can confuse the early bloomers like daffodils and crocuses. What a treat to be able to spend so much time outside with the girls though. With our vacation on the horizon, it's good to get a little exposure on them too, and I'm always encouraging them to go out and swing awhile while I get chores like the dishes done inside. I guess I'm fortunate that they beg to help, I know most kids don't consider doing so, but I do kind of push them out the door, telling them t go chase chickens or that TaTa (or little dog) needs someone to play with.
  Or, if Ray is home, he'll generously offer me some alone time, and I'll take advantage of the opportunity for a little spurt of unencumbered craft time, and can whip out a trio of cards like this one, created in about an hour while they walked around the back of the back yard. When you live on acreage, you have to be specific lol. Some of these will go into Pickers Northwest Antique Store and the horizontal card will head to Gig Harbor's Copy & Mail.
 I don't usually use our dining room table, but the sun was shining on it so invitingly that I pushed aside the placemats and set up a mini studio of supplies, including crochet thread, that gold chevron trendy tape from Queen & Co, and a 6x6 paper pad that complimented a handful of scraps from my bin. Then it was onto the MME pinterest board for inspiration! My favorite is the one that looks like little polaroids... I'll be using that idea again for sure.
Interested in soaking up the sun while crafting, or just sitting in the dark of winter reading this post? Come craft with me in this cardmaking video I published last Spring:
Wednesday, June 18, 2014
Fathers Day Gift-Cards

Traditional gifts for dad this year in the form of a shirt from me and another shirt with tie from Rainier :-) in the form of handcrafted paper cards, of course! I saw this idea while surfing the web (working) last Saturday. We made them Sunday morning and I think that helped them look so crisp and fresh.
My card is on the left and used a six by six My Minds Eye sheet as the shirt base. Its a subtle dark grey pinstripe which paired beautifully with these dark greybuttons from an Sei album kit. There was no + sign in the glitter thickers, but a couple snips later it is barely noticeably pieced together.
Rainier has been using scissors since a very young age and I'm so proud to see her advanced skills in how closely she followed the outline of the tie on her card. I drew a line around the outside, which she cut around, then she cut closer to the line again, and finally, cut the line off. On the inside of the card (which she makes first for some reason, and I always leave for the end), she stamped DAD and drew her sister's name as well as her own, and some other...sentiments.
Dad loved his card and we love dad!
My card is on the left and used a six by six My Minds Eye sheet as the shirt base. Its a subtle dark grey pinstripe which paired beautifully with these dark greybuttons from an Sei album kit. There was no + sign in the glitter thickers, but a couple snips later it is barely noticeably pieced together.
Rainier has been using scissors since a very young age and I'm so proud to see her advanced skills in how closely she followed the outline of the tie on her card. I drew a line around the outside, which she cut around, then she cut closer to the line again, and finally, cut the line off. On the inside of the card (which she makes first for some reason, and I always leave for the end), she stamped DAD and drew her sister's name as well as her own, and some other...sentiments.
Dad loved his card and we love dad!
Friday, May 2, 2014
Anna Griffin Cuttlebug Collection
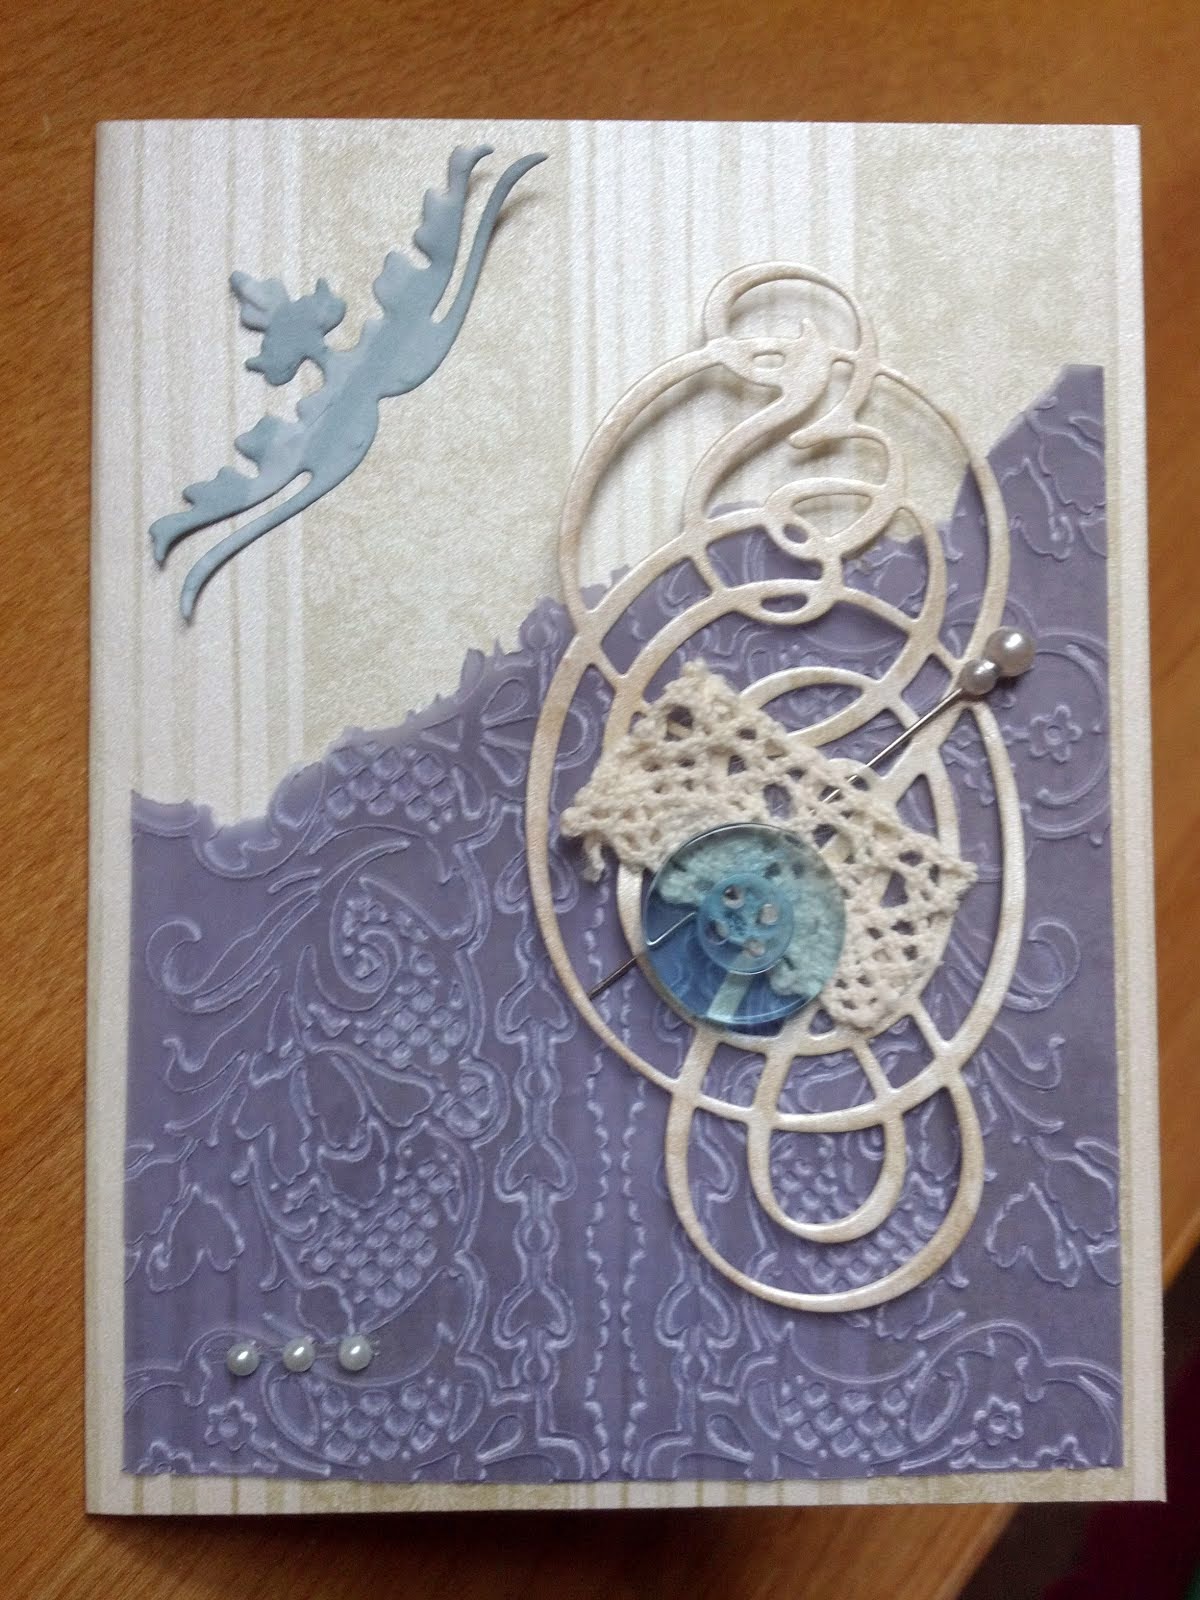
Earlier today my friend Ginger came over with her gorgeous, Anna Griffin GOLD toned Cuttlebug, and the dies and embossing folders she got as add ons in a QVC special. How fun!
I was so "impressed" with the embossing folders on vellum and the different textured cardstocks of various weights we tried out.
The two of us giggled the afternoon away and managed to put together five cards which Ill be featuring in next months issue of DieCutCrazy. Not a bad way to get into craft mode for National Scrapbook Day tomorrow!
Sent from my Verizon Wireless 4GLTE Phone
Saturday, November 30, 2013
My Cute Cowgirl
The girls and I had so much fun exploring the fairgrounds this year at the Western Washington State Fair.
 Formerly known as the Puyallup Fair, there seemed to be a childhood memory waiting to be re-lived for me around every corner! I was ecstatic sharing all the goodness with Rainier and Sunday. After all, they don't know what corn dogs and BBQ corn on the cob, and earthquake burgers, elephant ears, curly fries, and caramel apples and SCONES taste like, so they weren't disappointed not to be offered any. And there was no way I could share or withhold such goodness, so I was able to resist somehow as well :-) It's a good thing I never saw a pickle barrel, though, that might have snagged me.
We got to see a lot of our favorite animals, including, a Camel! By the time I was ready to leave, we were all pretty pooped (how could we have only been there for three hours?!), but I managed to get one more photo shoot in, and my cute little cowgirl hopped up on the hay bale before she realized what the reason was for. She never has been into smiling on command! Or photographic eye contact either. Hence, I got none of her looking adorable-y at me, but did get an adorable shot nonetheless :-)
The map print background is by Studio Calico, and I got it in a kit from a Creating Keepsakes class about Mixed Media. The kit included a piece of dressmakers pattern paper, which could have been adhered with decoupage techniques. I chose to just use my regular favorite Red Duck adhesive down the sides and then grabbed a couple border strips for the top and bottom.
Once I had figured out how I wanted all my layers to go, I got stuck. This layout sat for about a month on my desk, I couldn't figure out just what it needed. With the additions of the border strips and my journaling last night, I finally feel like it can be put in the album.
Whew! I don't like it when an unfinished something keeps getting in my way of creating something new, but it's almost a feeling of relief once I have it completed! And who would have guessed that pattern paper can work with our beloved patterned papers! Not me...
now where are all those old patterns I'm not using...

Here's another shot with the flash on, so you can see a little bit different view.
Wednesday, September 25, 2013
Slidings more fun with Friends

 Even though I have tons of both brads and buttons in my stash, I never think to use them because of my astonishing assortment of bling! I was determined to use many often overlooked products on this page, including paperclips, and whimsical animal stickers. Washi-tape, border stickers, and some pen outlining pulled the focus into the pictures of my girls playing with one of my great teacher friends, Miss Evans.
Isn't summer break from school just about the most looked-forward-to event of childhood? I can remember well all the grand road trips across country, visiting relatives and seeing our beautiful nation's landscapes from the van or motorhome window. My folks always stopped at several empty schoolyard playgrounds to let us kids stretch our legs. Now that I'm older, I realize it was probably to ensure a little nap time, too!


Friday, August 9, 2013
Four Generations of Fun Guys
I'm so happy to have grabbed this photo out of a text my dad Ed sent me earlier this year- it is such a rare occasion to have my two brothers, Ed, and his dad all together in the same place at one time. It may have been that I was missing being there so much that inspired me to create this page filled with sentiment and phrase stickers!
You see, while I'm fortunate that my younger brother Jeremy lives relatively nearby, my older brother Eddy and his family live in HONG KONG! Yes, that is a ways away from the Evergreen state hehee. So is New Jersey, where my dad and PopPop live just blocks from each other.
Earlier this year my brothers both traveled to NJ with their wives and my nephew Dylan and someone there was thoughtful enough to snap this amazing photo of the four generations gathered together. I'm not sure how many takes it took to get this shot, but I smile every time I see it- they all look so happy and have big smiles on, my favorite kind of pose! Plus I think it's great that it was taken in my PopPop's wood paneled living room- that wood paneling brings back a lot of memories from visits I've taken over there to visit.
I couldn't help but think that my Nana, who passed early last year, would have been overjoyed to see these guys all together- but I just know she was there silently offering up YooHoos for everyone :-)
Hope you enjoyed this video!
You see, while I'm fortunate that my younger brother Jeremy lives relatively nearby, my older brother Eddy and his family live in HONG KONG! Yes, that is a ways away from the Evergreen state hehee. So is New Jersey, where my dad and PopPop live just blocks from each other.
Earlier this year my brothers both traveled to NJ with their wives and my nephew Dylan and someone there was thoughtful enough to snap this amazing photo of the four generations gathered together. I'm not sure how many takes it took to get this shot, but I smile every time I see it- they all look so happy and have big smiles on, my favorite kind of pose! Plus I think it's great that it was taken in my PopPop's wood paneled living room- that wood paneling brings back a lot of memories from visits I've taken over there to visit.
I couldn't help but think that my Nana, who passed early last year, would have been overjoyed to see these guys all together- but I just know she was there silently offering up YooHoos for everyone :-)
Hope you enjoyed this video!
Subscribe to:
Posts (Atom)