If you were to click on the word "challenge" from the search list on the right hand side of this blog, you'd be able to tell by the number of posts that came up, how much I love a good challenge. A few years ago, I even challenged myself to scrapbooking 30 layouts in the month of June- and succeeded!
The latest challenge over at Shimelle.com is to scrapbook with the color wheel in an unusual way; using split complimentary colors. "Split complementary means choosing one colour to start, then going straight across the wheel to the opposing colour and instead of that central colour, choosing the one either side."-Shimelle.
I also love to be resourceful when it comes to my patterned paper. Truth be told, it's a compulsion to savor each pretty printed sheet in it's entirety. I've been working on using the beauty I have in supply instead of continuing to hoard the ones I've pay money for. The physical cost, the joy of purchasing remembered when I see favorites, the textures of some, like the Indi Chic print from My Mind's Eye, at left.
When I went down to Portland for the Creative Keepsakes Convention with my mom and brother a few weeks ago, it was with the intent to bring home some intel on what's to come over the next couple months in the scrapbooking industry. That, and to sit in on some classes as a volunteer. Oh, and to celebrate my younger brother's upcoming 30th birthday. Let me tell you how thrilled he was to be helping out when all 10 of the drying tools wouldn't work in our mixed media assist! And you know the ladies enjoyed seeing his smile- we shared the same orthodontist.
You'll see the artsy layout I made to commemorate that trip tomorrow, when I (gasp!) guest blog for my scrapbooking savior (Glitter Girl) Shimelle Lain. Today, I played with the contents of my Bible Journal Society kits. The die cuts are vivid and have a doodled or handrawn look that is so on trend, I can't help but adore them! Bo Bunny in bright, watercolored hues of turquoise and green are offset by orange and brown.
The focal photo is of my Grandmother's side of the family reunion, and the large arrow in the middle points to her and my Great Uncle, Grant. Preserving the handwritten year and family name were essential.
Stretching my supplies is also a must for me, and there are layers of cut-apart frames behind the large quote at the right. All of these colors from Basic Grey in the background compliment the vibrantly hued curtain behind this group photo.
Complimenting the story of this family's migration to North America from Norway are a big bold globe, with arrows pointing to the respective countries. Word sentiments included in the set are so versatile, I don't even have to include journaling :-) But one thing I will do is put this pic up on facebook and ask my relatives to identify their kin. Technologically enhanced scrapbooking, will this be my next big focus? hmmm.
Once I'd finished this layout, I couldn't just put my leftover pieces of paper away, of course I had to create one more layout! It has been a beautiful summer day, I was scrappin' outside in all of God's glory (read:bikini) and here I had the die cuts to exclaim my appreciation. Couple these bits with a devotional read through written by one of my favorite kit designers, and it was easy to whip up another page with a single candid photo of my girls about a year and a half ago.
That look on Sunday's face... What a little toughie.
Growing up isn't easy. There are all sorts of fears that young children face. There are simple times of joy when I want to sing it from the back pasture, Girls, don't ever feel alone!, and the watercolor quote on the left with the printed sentiment is then perfectly echoed by that pretty block on the right. It would be fun to get some colored pencils, markers, or paints out to play against that bold black doodled designs Shelby came up with.
The amount of love that is included in each of these kits has actually been a little moving. From the sentiments, book marks, rub-ons, washi-tape, die-cuts etc, to the words and references in the included devotionals, my thoughts naturally gravitated towards appreciation for my family - and the time they afford me to pursue my pursuit for Craft Diva Superstardom!
I've had a surprising amount of mini albums surface from the depths of my craft space, and put a little kraft covered, twine closing cutie from Close To My Heart to good use with little 3x3 pics.
It's been a while since I've made a video, but I just had to before heading to my first ever Portland version of the Creative Keepsakes Convention I love attending. I'm looking forward to spending time with my favorite designers as well as visiting my favorite booths to stock up on my favorite paper collections! Can you tell I'm excited?
Lately, I've been thinking about some of the changes that have occurred in our home over the last year... not going into detail here, but more reflective thoughts that I nonetheless would like to scrapbook in some form or another. Next week I'll have a video to reveal my solution, as well as a review of the trends I spot this weekend on the convention floor.
If you're not already subscribing to my CraftWithAnna YouTube channel, do so today~ that way I don't have to worry about you missing my next video release :-) Take care, friends, and keep it scrappy!
Here it is! My latest flick, and the first of 2016! Did you know, I published a total of 22 videos on YouTube last year? If you're hooked into the google, be sure to subscribe to my CraftWithAnna channel, or to this blog, so you don't miss any of the inspiration coming out of my neck of the Key Peninsula woods.
This month's show has a lot on show; featuring kits I've come to the end of, or were from the end of previous years :-
I've got a mini album for my cousin on the East coast who got married this summer- it used up some of those left over bits and pieces from Simple Stories and the Story of Us. Using the smaller 6x6 paper patterns makes it easy to fill a small project like this with appropriately sized items. One of my favorite pages is the one where I fussy cut around little frames and adhered them around a photo collage...gonna have to make idea come into a 12x12 page (and yes, I did just give myself permission to scrapbook)!
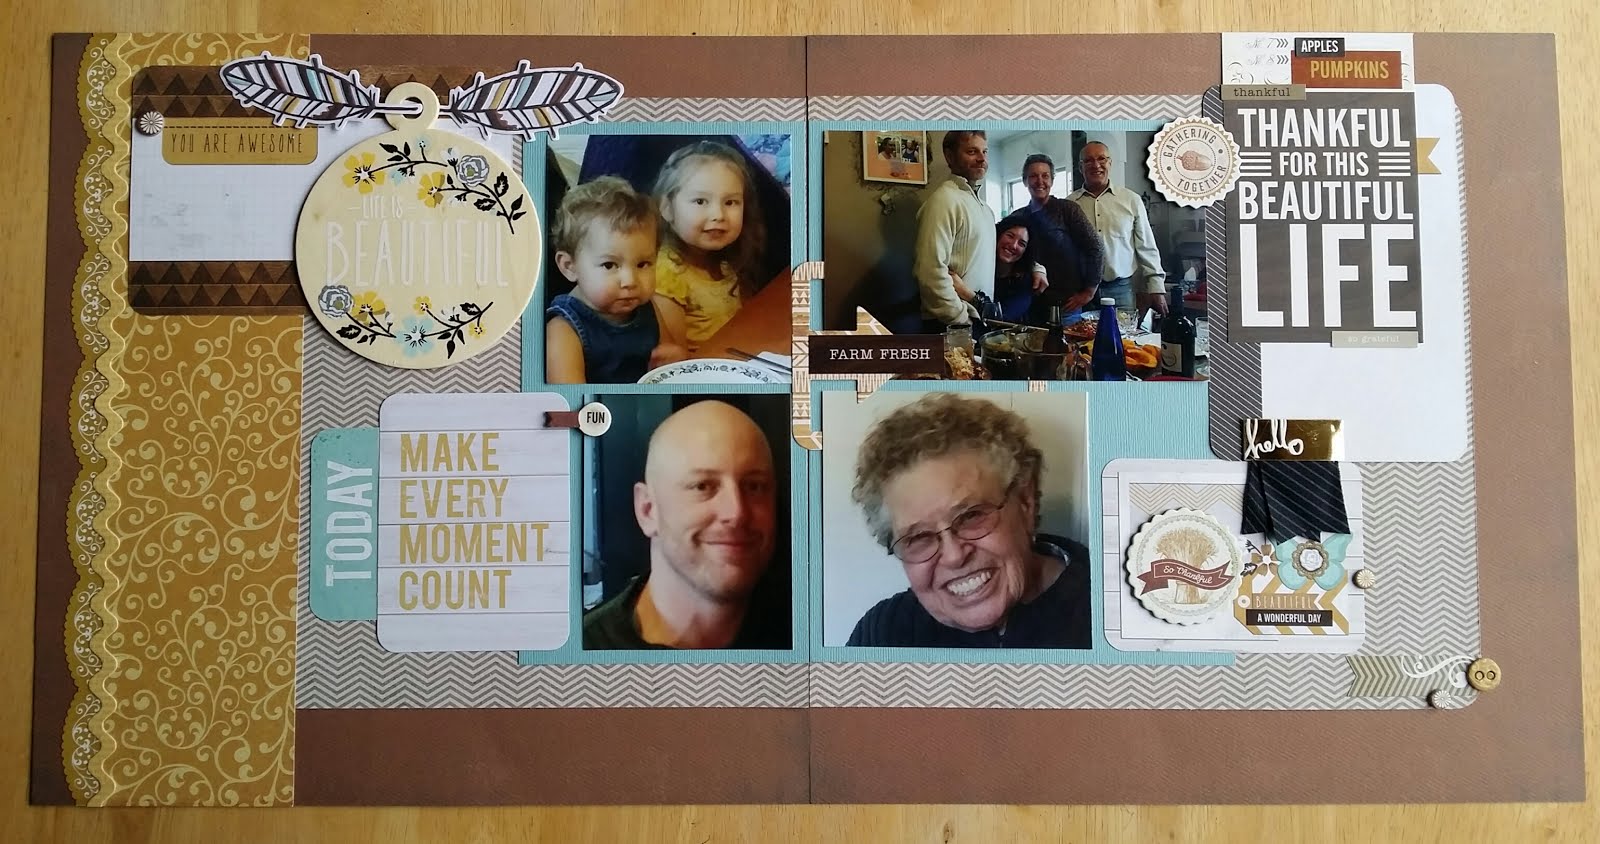
Then we move into documenting the more recent affair of Thanksgiving. I love that picture of my grandma, beaming from a still shot within my share video. There isn't anything I don't feel I can share with this gracious gal- in Norwegian, we call our grandmother's "Bestemor" and she really is the best! Every year we have her at the table is a blessing in itself. I only wish we could include ALL our long distance relatives in the festivities!
Check out my previous posts to see how the accompanying layouts turned out, and let me know- what are you scrappin about this week? Are you already onto week two in your Project Life? Still getting over the mountain of Christmas pics hurdle? Or maybe you're dreaming of an upcoming retreat to catch up at... leave a comment below or in the video, I always love to hear from you.
Tonight my two assistants will be accompanying me to the Red Barn for a painted lettering class I'm teaching the teens. Here is a version of the quick watercolor I did this morning to prepare- it's actually not this color at all, I was playing with my phone's photo editing apps again. I think it's so cool to see how an image would look if you had chosen completely different images or colors... a trick I hope you'll notice I'm embracing in my scrapbooking too. I would have never guessed I'd become that woman who creates an awesome visual and then clears it all away to start over. Call me Ms. Etch-A-Sketch, because I've done it twice already this year!
Now, are you feeling the need for shop retail therapy? Click these links to EmbellishKits.com or EmbellishOnline.com for all your paper crafting "needs-" and tell 'em Anna sent you!
And here's that stop motion card making video I referenced in this month's release:
Some people clean out their closets, set weight loss goals, maybe even get themselves a new planner to stay organized with at the beginning of the year. I'm one of those people (minus the weight loss, I'd just like to regain some muscles), but another of my tasks this first week into 2016 is to get my Christmas photos printed and housed.
As I've mentioned in previous blog postings, my Winter series of albums don't seem to ever get "finished." After pondering the pertinent questions of, does that matter?, why don't they? and oh, I forgot I was going to scrapbook that moment- how can I still fit it in? I've come to some conclusions:
No, to me it doesn't matter too much that my Christmas album from 2014 is just as incomplete as last year's. I'm always tucking photos away to go to crops- and then I print photos on the way to the event and buy papers to use with them there. And I know myself well enough to know THAT's not likely to change! But it's inevitable that I will always have gaps in my chronologically housed pages. I enjoy revisiting empty page protectors that sometimes have a few photos tucked inside- they are like treasures; scrap worthy time justifiably waiting to be used.
Why don't my albums get finished? Because Life Happens. New photos are taken. I'm also starting to wonder if the January, CHA spring and summer themed releases aren't moving me out of holiday move at more a rapid pace than my shopping habits of yesteryear did. I'm grateful to have the amount of time and space to dedicate to preserving the highlights of our life together. I love seeing all those smiling faces every time I go looking for where to put in another page that has finally seen it's way to completion.
Now, the fitting into previously deemed "completed" albums all those additional printed memories can be a bit more painful. Take this year's fall- 2016 run of albums... there are now five of them. FIVE, PEOPLE! Thank goodness for pocket pages, where I can slip in the photos I've printed, theatre tickets, embellishments, etc and keep them in the album they'll hopefully stay in until I can stick them all together on pretty cardstock. I say hopefullystay, because as my album clean ups have been showing me, I drastically underestimate the amount of space my photo documenting will take up.
Looking good - it runs in the family
Original "done" pic of album pages
Case in point- this year I plotted out two albums to fill with this time span of Thanksgiving through New Years. Yesterday, as I sorted pics into pockets and included all those holiday papers and embellishments I keep finding I've purchased- strange... I have no recollection of doing so- I realized I really needed an in-between album to lead me from the last weeks of November, maybe even into the first weeks of activity filled December, and another for all those fun family pictures taken during the week of Christmas, and then another album just for Christmas Eve and Day themselves! Oh, and then another album for the papers I had to have and the pictures from our trip to Long Beach over New Years. WHEW!
But then, to relieve some of the stress of sorting without creation, create I did. I started with a layout inspired by the EmbellishKits.com January scrapbooking kit. I'm hoping to have a video up with that process, but that's another post's content. Having quite a few Thanksgiving pictures, I figured I'd finish up those layouts and that would help me transition fully into the documentation of all things Holiday related. Took my photos and collaged them as you see above.
Except, then I realized that my story would fit into my album better if my pocket pages were located before my two page spread, not after. So I changed that all around and then figured I'd slip the rest of my photos into place, making a total of 4 layouts completed. I really like the kid-colored Native American who looks like she's walking from our house to my mom's, where we took all our food to celebrate with due to her having surgery earlier in the week. And when I rearranged all the photos from my "done" pocket page photo above, it was really easy because I didn't have to cut and past or anything like that.
Custom colored embellishments go here ^
Thanksgiving at our house pics on this page
Flip the page to go to my moms house
Redone and just as easy to put together
Spoiler Alert! Next video's layout above!
Now, I've got plenty of yard chores to do and that video I mentioned to edit and upload, but a crop of golden embellishments awaits me- this evening my happy, scrappy friends and I are getting together to indulge in a bit of cut and paste (with a side of chocolate). I've already submitted three orders to Walgreen's, so I'll be right back in the now where can I fit these photos boat by night's end.
And for that, as well as the readership of people just like YOU, I'm very thankful.
I love and adore the concept of a December Daily album. As you may have read in previous posts, I'll be following along with Shimelle's Journal Your Christmas class again this year. It's always interesting to see what the prompt of the day will be, as well as my family's reactive conversations.
For instance, I don't think I realized just how much my mother-in-law enjoyed shopping for Christmas ornaments, or that my older daughter had picked up on (and insists that we carry on) many of the traditions we shared from our youth with last years journaling prompts. These small smile-abouts have only been tempered by knowing that, despite my best intentions and pre-plans for success, I'm still staring at empty pages in last year's album for this month. I still have stories that are not included in those album sleeves, too. I guess there is no wrong time of the year to continue recording, and I have put chronological scrapbooking way out of mind, but the way I do scrap is by putting my pages into a "current" album. And without that album at least purchased, that's a little harder for this crafter to do!
This year I decided to put some of my pre-holiday shopping into a plan of action that will be fun to use. Starting with a few scrapbooking kits I picked up on discount from EmbellishKits.com, I've now got plenty of product and pretty patterned paper to choose from once I get a few photos printed and make time to document our month's happenings.
A trip to Michael's on Black Friday brought home a gorgeous new addition to our memory hoarding library, which, coincidentally was just moved into a new location. This new album features gold roses outlined on a kraft background~ simple but stunning! What a joy it will be to place inside our memories of Christmas past and present, and now, housed within a few chosen sleeves of various sizes, are those gorgeous kit contents. Embellishments galore from Fancy Pants and Simple Stories, sparkley rhinestones, and perfectly coordinated twines and ribbons are included too!
You can see what I'm talking about, and maybe even get some ideas you can incorporate into your December scrapbooking process, in my latest video:
One bonus I did not mention in this video: with all I need within a grab-able place, I could actually take it with me while I travel about spending time with family. This album has the most potential to include hand written pieces from family of any that I've created to date. If even one sentence written in another's handwriting gets included, I will have a very merry memory indeed :-)
So, what are you doing (or not doing) to record the sights and sounds of the season so far? I'd love to hear about them~ leave a comment below or on the video and as always, thanks for stopping by to CraftWithAnna today!
The last few years, at the close of the Creating Keepsakes Convention, I've drawn the winning name for a prize from one of my favorite vendors, Queen & Co.! This year is no different, and there are quite a few ways to win.
You can subscribe to this blog. Doing so will get you emailed versions of all my blog posts- so you never miss a chance to CraftWithAnna!
You can subscribe to my YouTube channel, which is just a purple icon click away- look for that on the right hand side of this page with other social media icons. Instagram follower yet? That will get you an entry too!
You can also comment on any of my recent videos, including the one that hit YouTube TODAY- the November scrapbooking layouts from EmbellishKits.com.
Or, you can comment on this blog post. I loved hearing from a follower at the convention this year!
With so many ways to win, I bet you're wondering what the prize is... well all I will say is, it's going to be some bangin' bling bling baby (the contest name is Queen of Bling)!
Wedding cards are always good to have on hand, but it seems like mine always say "Mr. & Mrs." and not much more. This kit from EmbellishKit.com fills the gap in my stash of smoochy supplies with the beautiful Simple Stories collection, The Story of Us. Dreamy!
Earlier this week, my younger cousin Daniel left a very sweet message for our family on my facebook timeline... did that message inspire this 8.5x11" layout? Not entirely, but it did prompt me to ponder what a treasure this sometimes misunderstood young man is to our family. In my head I responded with similar praise for him. I came up with flowery sentiments that expressed how much I value his healthy way of interacting with others, how the lifestyle he has may not be what I have in my life, and yet in many ways parallels the choices we make in our natural approach to existing.
You know, to be an original takes guts. It also takes a positive attitude about oneself, lacking in grandiose illusions. It takes research. It takes initiative. It takes follow through. Sure, there are small ways each of us can rebel against "the man" and what society tells us we must have for success, but to live a life that recognizes rebellion as a stance for ones own life, well that to me is no a rally cry for anarchy lol. I guess I'm trying to say that thoughtful living is a trait I've learned is worth admiring.
Alas, I wasn't running to post my thoughts and with the usual living we do around here, the flowery sentiments slipped away... I was still able to post a quick and reciprocal "thank you for being part of my family," yet, this feeling of strengthened kinship lingered. And then it happened: this tiny photographed picture of little Danny and our cousin David out front of grandma's house surfaced from amongst the paper piles in our craft room. Well where the heck did that come from?! Serendipity!
I'm still working out of the kit featured in my August YouTube videos, EmbellishKits.com's Alternative 17 scrapbooking kit. It features the Legacy collection from Simple Stories. I also have the 6x6 paper pad from that line, so I cut out some of those smaller patterns and added them to a piece of that creamy textured Bazill cardstock to build this old-school-sized layout for our family's album.
I love how the vintage tones compliment the '90's vibe of the boys all dressed up for school. I love that I can see my grandma's neighbors yard looking vibrant in it's hey day. I love that I knew the picture was at grandma's house right away! I love how the boys are posed; the special relationship they shared at the time and how it reminds me in an instant of seeing them with my brother, who is their same age, grouped together in matching outfit as infants.
I love that although the paths of the lives my cousins and I have taken have led us in different geographical directions, led us to alternative career followings, have introduced new ideas about eating healthy to our aunts and uncles, and yet still intersect in this same photographed location: grandma's front yard, the doorway to our Happy Place.
Thank you for making this a Family Flashback Friday, folks <3 Love you, Daniel!
Whoo-ee crafters, I've been busy busy busy this month! What with making all the pages and the cards featured in this new video, spending more time than ever with my loved ones, and creating a storm of cards to sweep through the latest Key Peninsula Barter Fair, I've hardly known where to hang my hat! Or, I guess it should be a place to hang my scissors. Or the washi! (Oh, the waaashiii)
I counted making something like 20 cards this month... not bad, huh? That's a little more than a card a day. UNLESS you're like me, and postpone somehow the inevetible and then crank out 9 in a single sit down! Okay, I realize you may not have that kind of time, motivation, or inclination. One of the reasons I never sold cards regularly was because it does indeed take a certain amount of discipline. Not a word I tend to accompany with my craft habits lol.
I've found myself in the conundrum of wanting to make, having reasons to make, and yet, not being willing to part from participating with my family to do so... good thing I've raised the girls to make right along side me! But, supervision is often times necessary, and not always easy to give when the desire to create for me is in the way. I suppose being aware of the problem is half the problem itself, and I think with a little thought towards scheduling some paper time, I can get a good little cushion of ready to sell's amassed yet again.
The holidays are coming- no, I know they are not just around the corner- but friend, they are! Lucky for me, my creations didn't sell quite as quickly last year and I have a box of fall through the end of the year beauties to re-release next month. For now, I'm going to turn my attention back to the family, and mentally compose some late summer, early fall colored patterned paper themes, harvesting good times inside and out :-)
As always, hope you enjoy the video, and thanks for reading!
It's time for a new Scrapbooking Tutorial, featuring this kit: Once I lined up the photos I wanted to accompany the two, double page layout designs featured on the full color example, it was a snap to create gorgeous layouts. The Simple Stories papers have always been a few of my favorites. I actually used some of these same embellishments earlier this year to make a darling card.
I find it easier to select place my die cuts when I put all of the ones I may want to use right by my workspace. Then it's playtime! Layering with pop dots adds dimension and inking the edges adds texture. In the video below, you'll see both those techniques. Thanks for stopping by- I'm only three subscribers away from a contest give away, so click on the link below and subscribe today if you're not already :-) Enjoy!
Wow, the I love Sunshine collection pieces included in this month's scrapbooking kit from EmbellishKits.com were so packed full of fun and the warm colors of Summer, I could hardly stop making from it! In fact, after I completed the double page layout featured in our July EmbellishKits.com Scrapbooking kit preview video earlier this month, I went on to create two more scrapbook pages, ten cards, and two beautiful home décor pieces. And I STILL have goodies to play with! Check out this month's scrapbooking kit share video to see just how many stickers, chipboard elements and paper scraps I still have, and don't forget, many of these items should still be available through our favorite online source for papercrafts, EmbellishOnline.com
This month Shelby sent us a cool cut-apart sheet from Echo Park's I Love Sunshine collection. The 2x12 inch paper strips can be cut however you like, and in our tutorial video, we did some fussy cutting to create awesome embellishment clusters. For this half of the other double page layout designed for this month, we took the days of the week, and cut around the tabs, stacked them, and wow! Now we have layers that lead us through the week in filo-fax fashion.
Christmas in July~ Sliding Into Summer at St. Nicholas'
I love to dig into my own stash of stickers, but there were so many pieces to choose from this kit, I could go really go crazy! See how I split a rainbow polka dot chipboard frame to house two different stickers sets? I also added sunglasses, the rest of the rainbow dot border, a chipboard butterfly on top of a few squares from that ultra summery sheet that looks like postage stamps. The reverse pattern is stretched across the page and gives the photos a cohesive background. Another darker blue mat behind the focal photo pops it off the page- and don't those smiles bring a grin your way too?
I mixed my own alphas and combined them with that large chipboard SUMMER to create a fun title which reads, Sliding Into Summer. If you're ever stuck for a title, hit up Google and search for ___________scrapbook title. I typed in "Summer fun kids scrapbook title" and found one that fit my theme and style.
Relax- Days Like This Make Life Sweet
For the opposite side, I cut a tiny bit off of two sides of my background so there is a bit of white peeking out . I love that offset look. There was a reason for it though- you may have read or heard me say how much I hoard paper, so the background here is actually about five different paper strips, assembled on top of a plain white piece of cardstock. Using paper economically really makes these kits stretch, but even if you follow the clear cutting guide and placement directions included, you'll have lot's of left over paper and embellishments when you're done. Stacking pennant shaped pieces of paper is a terrific way to use up some or all of those scrap papers! Vary the widths and lengths for added interest and dimension. You could even use pop dots or foam adhesive under some of the tips so they appear to wave in the breeze.
A little birdie told me, Be Brave
Instead of one large photo, I chose four smaller photos of my daughter experiencing the glory of the outdoors on that same camping trip you saw photos from in June's scrapbooking tutorial and kit preview video. She loves paper (of course; she IS my teaching assistant), so I included some of my scraps in a little bouquet for that adorable chipboard bird to hold proudly. The wood veneer flag is the only piece on this layout that was pulled from my stash.
I love this photo of her with her dad; when I was a little girl my dad would coax me closer to the edge so I could see those amazing views that my fear of heights would have prohibited. Having my dad there when this picture was taken, well, it just made story come full circle and that is one of the best parts of scrapbooking memories to me. Oh, and yes I did venture close enough to the edge to look over this rock into the pristine blue-green waters of the river flowing behind us- and even snapped a photo (carefully). Now for the card collection!
Cats are people, too
An associate of mine recently gifted me a large assortment of greeting card fronts, and I put a few of them to use this month. For this cute cat card, I just layered a recycled card front with some washi tape on the bottom. Saved some glue that way, too! For the embellishment at the bottom, I layered a sticker that I didn't think I'd use under the chipboard flower cluster. On a large sticker sheet, it's okay to not like every single icon included. Take a glance a the sticker's shapes; think of how those shapes can be layered behind other pieces, and build up from there. A little bow made from the included baker's twine completes the front, and then I cut a small amount from the side and adhered a border sticker to peek from the inside. A little fun and it pulls all the colors together, too.
No really, it can't get any easier than this!
The next card was made in the same "batch"- I usually create between two and four cards at a go when I'm in the groove. You know, every day lol. Now, printed card bases are another really great option for creating quickly. Here, I've used one with a printed pattern on it- even easier than cutting a piece myself! Then, another card front cut down to size, a butterfly cut from another card, and finally, a foam adhesive backed sticker from our kit which reads, "It can't get any better than This."
Have you ever had a cool glass of lemonade on a hot summer's day? Well, if you haven't, you should, and if you have, I think you'll agree that there is little else that could be so refreshing this time of year (unless you are 21+ haha). I tried to channel some of that feeling into this Summer Fun card, and grabbed another pre printed card with a tiny black chevron on cream.
Customize your stickers!
Using some alcohol markers and a few big brush pens, I colored in a few of the stripes with cream and two different aquas on the top, and a green line at the bottom to mimic the sky and ground. Then the lemonade stand sticker, and a postage square of color, split in two and layered behind the Summer Fun chipboard piece to create a custom banner for my card front's booth! Tiny knots of the bakers twine at each end of the banner, a stamped pennant waving in the breeze, and a pinwheel sun. How Fun!
Splashing Optional
Here is that same preprinted background you saw earlier, this time I just layered a bunch of the scraps- I got the idea from that rainbow, "Paint Sample" patterned paper from this collection.
A few stickers, including the Cool in the Pool which I layered over a scrap of the blue swirl/postage icons paper. Add three or four different colors and sizes of blue bling, and you'll be ready for a dip! Hey, if you bring this card along, you can write to a friend about how much fun you're having. Even if they are sitting right next to you.
Here's another card that's "cool." The icons featured in the background all come on one sheet of paper- hmmm, that was hard! Actually, I did find some thinking required, for me anyway, in regards to which icons I wanted to cut solo, and how to keep a block big enough to include on other projects. I dressed up the front by adding blue bling from Queen & Co on top of that small piece of blue. Another little scrap was stretched to appear top to bottom- you can just barely see that peek of aqua, but it really adds a lot and helps to ground the entire card front. I also added tiny blings to the flip flops, the sun, to the pink square at bottom right, and to the O in HOT.
Can you see the shadows created by two different layers of foam adhesive? Bringing dimension to your project may cost more to mail, but the effect is well worth it. The elements seem to jump off the page now! If it's really hot where you are, like it is here this week, I apologize for making that popsicle look so delectable :-)
Now, where is the best place to enjoy the sun besides the pool (or for some, from inside an air conditioned haven)? At the beach, of course! My aunt and uncle were down there playing last weekend and inspired me to use eight more stickers from that large 12x12 sheet in this month's scrapbooking kit. Building a scene like this does take some imaginative planning- or not! Have fun, or if fun is fearful, cut your stickers from their sheets so you can move the elements around freely.
The sun up top is cut from a paper scrap, and the other journaling square, pulled from my stash for it's colorful border, is turned on it's side as a layering base. Speaking of having fun and using your imagination, take a look at my "waves," they are really just the pieces left behind from where I peeled off the border stickers!
Inspired by love <3
My aunt and uncle spent a lot of time downstate at the beach, and since we loved to spend time with them, my family was often camped nearby. I have so many fond memories of doing so, and many of them were stirred up when I saw their family photo up on facebook after their return. My beautiful aunt has set such a strong example for our family as she underwent multiple treatments in her fight against cancer these last few years, and I was happy not just for her returning hair, which looks uber-chic, but for her being in a place she loves, surrounded by the family that remains by her side through thick and thin. You just gotta love LOVE!
It's getting hot in here, so wear a cute swimsuit!
Another friend who just moved into an apartment with a pool inspired this next card- Hot Summer Days should come with some all natural sunscreen, huh? Or an umbrella with comfortable seating, and some rainbows! LOL, I found a place for one of the hundred or so paper clips I've brought home from the corporate world. It just goes to show, with a little pattern and bakers twine, even the simplest of household or office items can be transformed into a cute embellishment cluster.
Sequins + Fair Fun = End of Summer Fun
Sequins have made a resurgence amongst crafter's supplies, and it's no wonder! They are sparkly, simple to add, and you get A LOT for a little $. I built a little Fair scene on this card front and added gold sequins to the pre-printed background. For this custom stand, I used the chipboard lemonade stand and cut off the top where the lemonade sign sat. Then I used foam adhesive to pop up the Summer Fun banner sticker, and behind that I used some old Echo Park tile letters to allude to the fall fun that's just around the corner. Hmm, I'll have to take a look for my leaf-themed products and start to change my mood to sweater weather... But not quite yet! Another friend just took her family for a long needed vacation to Hawaii. As I remembered her expressions of "Why don't moments like that- amazingly good times- last forever!?" my eyes fell on the manufacturer's strips and the little paper collection titles that come on them. If you scroll back up to that camping layout I made for Rainier, you'll see I've used a few there as well. Layered over that pink chevron chipboard banner piece with a little splash of green behind that cluster, this tiny scrap of paper brings a simple sentiment to the front of my card. Truthfully, there is an "I" on that pennant, but I didn't want to use it that way! So remember, when you can't think of a way to use an embellishment, take a look at the colors and it's shape, and you may be surprised to find it on your next project after all!
Now, with all this colorful summer fun going on in my craft room (and sometimes in front of our picture window at the dining room table), I thought it would be great to pair a pop or two of color with some black and white and cream for a striking ensemble. Adding a bit of sparkle wouldn't hurt, either, huh? I used some of Heidi Swapp's gold & silver foiled calendar inserts for this card- just a few squares of your paper stash would work just as well, though, don't you think? This card was so easy to make, I thought the chipboard sentiment, Lazy Day was more than appropriate. Have you ever stopped to think about how many crafters you've had the pleasure of sharing creative space or ideas with, be it online or in person~ sometimes those people you watch on YouTube are almost like family! I tend to think of designers that same way, and my heart really went out to the Swapp family last week as they mourned the sudden loss of Heidi's son.
All because two people fell in love...
Unfortunate happenings like that can be a reminder to cherish loudly the ones we love ourselves. With a lot of realizations and positive changes in our relationships the last few months, I felt our family would benefit from an affirmation list of sorts. It just so happened that the last free class I taught at Michael's was going to be a Tim Holz inspired mixed media piece of home décor- perfect!
Taking an old frame picked up garage sale whose glass had broken, I layered more Heidi Swapp papers under and to the backs of a few acrylic tags. Another of her calendar cards made a place for my statements, and then I used one of her wood veneer pieces at the bottom. So why is this project included in this list of things made from our July EmbellishKits.com scrapbooking kit? Because if you look closely, you'll see another tiny bow made from the baker's twine from this month!
Love This!
And what did I bring to class to use in my in-class demo? More of that kit lol- I was able to use up the rest of those rhinestones, more stickers, and even some of the postage paper icons and some chipboard. Now that's what I call a sunshine filled piece of art!
Thanks for joining me in a review of the many projects I've created so far from the July Scrapbooking kit from EmbellishKits.com. There is plenty more Echo Park to shop from at EmbellishOnline.com, so if you'd like to recreate your own focal point for the home, your album, or to send to a friend, click on those links and send some happy to your home.
Next month I'll be scrapbooking and more with one of the Alternative kits... hint, hint, it's a heritage theme! So start looking through your stash (or just apply a few aging app filters) for your favorite family photos, and be prepared for an onslaught of memory preserving momentum coming your way :-)
Happy Scrapping!
Hey There Crafty Friends~ It's time for another EmbellishKits.com Preview video! This month's scrapbooking kit features bright and cheerful "I Love Sunshine" pieces from Echo Park; chipboard stickers, a full sticker sheet, twine, AND bling, as well as beautiful tones of color filled patterned papers.
We're working with a cut-apart sheet this month for our title and embellishment clusters are accented with stickers that just scream SUMMER! I loved playing with this kit and I know you will too.
Here's a look at that CraftWithAnna tutorial layout from this month's Kit Preview video
When It comes time for you to cut your layout apart, you may become more aware of that seam than you were while creating... so if this is a concern of yours (or perhaps a lesson learned from a previous experience), try adhering all your paper strips, and then your chipboard and sticker accents. Your standard paper trimmer won't be thrilled about trying to saw through your thicker elements while you curse from above!
If you are not already subscribing to my YouTube channel, I encourage you to do so- I'm nearing another personal milestone of having 75+ YouTube fans, and want to give a prize out to one of the 6 people new subscribers I need to hit my goal something fancy -and fabulously summery! Feel free to share this post and the video links, and if you happen to leave a comment on YouTube or here, I'll put your name in as well :-) HEY that means there's more than one way to win people!
Thanks for watching, and check out the completed kit share video and post coming out next week~ until then, Happy Crafting!
P.S. On a much less happy note, my condolences go out to an industry favorite of mine, Mrs. Heidi Swapp and her family, who suffered a loss in their family this week. Perhaps this is a good time to send a greeting to someone you know who may be missing their favorite summer sidekick this month...
I had never considered the art of papercrafting to be a very deep subject, until I started developing my Scrapology class series... As I considered the topics I felt passionate about covering; the thought process involved in the creation of those beautiful stories on paper, and the amount of energy which goes into selecting all of the elements that combine to share our musings, I realized that I in fact do feel very strongly that what I do is ART.
You know, I didn't go to college to earn a degree, with subjects such as Card Creasing 101, (prerequisite class being Cardstock: Fiber to Fascinating), Photography 101(more like-10,001), and Album Management. No, I learned those through time and by playing. A LOT! lol
I've brushed up on skills through the years through a wealth of online You-niveristy courses, interacted with fellow artists at annual conventions, and my subscriptions to various printed resources are (prohibited from meeting the garbage can) all stored up for easy access. Debated with confidence the pros and cons of certain styles, compared fussy cut images to those manufactured with the aid of a machine, and yes, I've been openly critical of both my own paper backed projects and those of my peers.
And yet, when I entered these beautiful, framed scrapbook pages highlighting the memorable occasion of our second daughter's birth, and that fun greeting card above, which says little but expresses so much of my impression of a life changing event, to a local juried art show this spring, I was informed that my submissions did not qualify as Art and are instead to be categorized as Crafts. SayWhat?! (imagine coffee spraying from my astounded pursed lips)
So what are your thoughts, dear reader? Does an Artist's Trading Card created with talent and tiny found objects deserve any less consideration than an 8x10 canvas splattered in no apparent pattern by various colors of paint? Can you think of pieces you've seen hanging in museums and thought to yourself, huh, I could totally do that! Seen any of the beautiful reclaimed art pieces and wanted to dig in your own burn bin for well distressed compressed fiber blocks (i.e. fence posts)? Well, you may be an artist!
Thanks for taking the time to ponder with me as we head into the fireworks of Fourth of July. Let the oohs and ahhs around you and in your heart inspire some fantastic works of art for this month's sharing... Watch for my next EmbellishKits.com summer scrapbooking kit review and Tutorial video coming soon, and Stay crafty!
In case you didn't feel like reading about all the projects made with this month's Scrapbooking Kit from Shelby at EmbellishKits.com and EmbellishOnline.com, you can view them in this quick video! Thanks again for watching! Take a look at the right hand side bar on this website and you'll not only see direct links for BOTH of those incredible craft cruises I'll be teaching on next year, but the little purple instagram link is there too.
Look for our CraftWithAnna team on the Peninsula High School track tonight and tomorrow morning- and by all means feel free to join us!
If you'd like to support us long distance, consider hitting us up with any of the social media options, especially Facebook Messenger, Twitter and Instagram under the hashtags #CraftWithAnna & #GHRelayWithAnna. Now, Go. Get Crafty!
This week, Poppop and Nana are occupying the "T" -as we call the camping trailer we keep for out of town guests. Working with the June Scrapbooking kit from EmbelliskKits.com already had me in a nostalgic, old timey car loving mood, but that feeling is always enhanced when in Bundro company. As a teenager, my older brother painted the image of Ed's truck onto the rig's air filter. Even after the truck was sold we were surprised to see it while filling up at the local "Four Corners" Texaco. One of my clearest memories of my younger brother as a toddler is of him exclaiming "Car-ee" while proudly holding up the decoration off a birthday cake. Needless to say, it was no trouble finding memories that went perfectly with the designs included in this month's kit.
Let's get SCRAPPY!
One thing about memories, though, is that they don't always have tangible photos readily available. That didn't stop me from using up all but 3 die cuts, a few inches of twine, and roughly 4 x 0.5 inches of the papers Shelby assembled for our two, double page scrapbook layouts! The stickers were harder for me to find homes for, just because personally I'm not inspired by "son" stuff- SUN stuff, yes though lol.
Add caption
My daughter's have taken practically every class I've taught, and being the mimics that kids are, a mini cardmaking class was taught to Poppop in the front yard next to our newly created firepit.
Using a group of similiar themed items is a great way to embellish a card or even a scrapbook page. Put them in a grid as my family of crafters chose, or group them with some fibers, brads, and or bling to create a whimsical banner as I did on our second layout created from this month's kit!
Throwback Thursday
My brother's birthday being this week, there was plenty of inspiration for those car themed items. One of my annual goals is to use supplies in my stash that are collecting dust, and acrylic of any sort seems to be the product I can never think to include. I've always liked the look of acrylic cards and decided that a little birthday card/mini album for my bro would be the perfect way to give him photos from that trip we took to Lake Cushman last weekend.
Inside features awesome family camping trip pics
Back Cover closes with a Smile
I love having a pre made album prepped before an event... knowing which shots and even which orientation I need photos for not only makes for a terrific finished product, but helps me seek those shots that make it so. And then, sometimes those candid moments come completely un-staged, like the ones I included of us climbing into photo shoot position and of Ed flexing his guns for his visibly unimpressed son. For the second layout feaured in the June Scrapbooking kit from EmbellishKits.com, I was really stumped for pictures. I considered doing a layout about my own dad, with a focal/main photo of him holding my girls, and an accompanying page of him through the years with each of my brothers and myself. Alas, as mentioned before in this post, sometimes the images of memory aren't readily available in tangible photo form. Instead, I crafted up a couple lovely cards perfect for Father's Day.
Then, inspiration hit! That title of This Is What Handsome Looks Like brought to mind the hilarious photo Rainies dad sent me of her one day while I was still working full time (at being a part time employee). Our little chub-a-lub was decked out in an ill fitting polo shirt with an accompanying caption of "Isn't he handsome?" We have two daughters, folks! Anyway, I still crack up thinking about it and decided to give Sunday a few more reasons to resent my scrap-a-licious ways by dedicating that "handsome" decree to images of her first haircut. See how I layered icons that fit my theme to create a banner similar to the one shown in this month's design? This is a super fun way to use a lot of products to create a wow embellishment.
Second layout from this month's EmbellishKits.com scrapbooking kit.
By continuing those same icons in embellishment clusters across the two pages, we can easily create a coherent layout! Considering the amount of pictures I had on hand, I could even spread those themes of time, barbershop, and camera across a couple more pages. The top two photos on my page flip up to reveal an additional layer of cute, as well as my personal musings about why in the world I get so emotional about a few snips with the scissors. For now I've housed the remaining photos from this sentimental snapshot in pocket pages. If I forget to come back and scrap them, they will still be on show for viewing, and I can always add a few patterned papers or project life cards and call the story told.
I couldn't help but reflect on how much I ended up enjoying working with both the May card kitand this June scrapbooking kit, both of which featured patterned papers and embellishments from the Jack and Jill collection from Echo Park. Shelby included so much product with each shipment, that I had enough left overs to create over ten additional projects! And, having those smaller patterns left over to add to this kit made it possible for some more wood veneer fun, like the "hello" I adhered with mini glue dots next Sunday smiling with her new hair-do. Hey, justifying an addition to your club membership is certainly something I'm qualified and happy to do! You can find more subscription details at EmbellishKits.com.
So what's next for creativity this week? I've got my CraftWithAnna team registered for this weekend's Relay For Life at Peninsula High School where my crafty friends will guide participants through a quick but cute thank you card to send out their supporters. We'll also be creating mini memorial albums, so a lot of fun and memory sharing will be bound to fill my heart with happy. I'll be spreading the word out about my upcoming craft cruises, too- wouldn't want to deny any crafties the vacation of their dreams don'tcha know!
Another card just waiting to happen
Aside from that hub-bub of fab, I've got just a few more scraps to, well, scrap, including this pile which just happened to fall into a card design on it's own... gotta love it when THAT happens! Watch my instagram account @AnnaBradshw to see how it turns out and to catch highlights from this weekend's event.
Now, GO GET CRAFTY!


 If you were to click on the word "challenge" from the search list on the right hand side of this blog, you'd be able to tell by the number of posts that came up, how much I love a good challenge. A few years ago, I even challenged myself to scrapbooking 30 layouts in the month of June- and succeeded!
  I also love to be resourceful when it comes to my patterned paper. Truth be told, it's a compulsion to savor each pretty printed sheet in it's entirety. I've been working on using the beauty I have in supply instead of continuing to hoard the ones I've pay money for. The physical cost, the joy of purchasing remembered when I see favorites, the textures of some, like the Indi Chic print from My Mind's Eye, at left.
 The focal photo is of my Grandmother's side of the family reunion, and the large arrow in the middle points to her and my Great Uncle, Grant. Preserving the handwritten year and family name were essential.