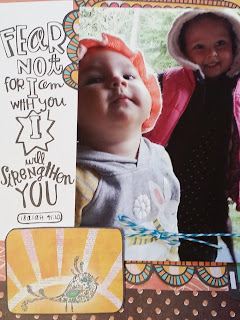
 I've always been drawn to washi tape. Ever since it's debut, I've enjoyed it's versatility, layering it beneath and over patterned and plain papers, using it to adhere or cover embellishments, adding a bit of grounding to a cluster or a pop of color to a corner with a tiny tear of fabulousness. You know how sometimes a bout of inspiration hits you so hard, you almost get a vision of how your layout might turn out? After a recent washi-swap, I came home with a clear but now colorful acetate sheet of shared strips, and it occurred to me; those punches and branding strips I hoard but rarely use could be used in a new fangled washi way to create some cool, custom embellishments and layers on this page documenting a recent road trip with my family. Lucky for me, all these little doo-dads came together just as I had envisioned it :-)
Thanks a lot to Shimelle.com for asking me to guest artist on her blog today!
 |
| P-p-p-punch it, punch it real good! |
I started by spritzing Mr. Huey's in Opaque White onto textured orange cardstock, and while that was drying, I cut a double photo mat for my photo from the A and B sides of Shimelle's Earhart and a square block that would be hidden by that photo grouping from the background. I'm a #papersaver; it'd be used later to customize an already cute chipboard shape with stamping and a layered die cut globe image by Tim Holz. I love to make my sheets go the distance, what can I say!?
 |
| Cluster of Embellies at top right of page |
Now for some more fun; alternating those branding strips from Simple Stories' I Am collection with WeR Memory Keepers aptly named Road Trip, and more left overs from Shimelle's first delightful line of papers. From among my new washi tape treasures, I tried punching some sentimentally appropriate hearts from a wide gold polka dot pattern of tape and the new We Are Family washi tape strips, also from Simple Stories. I ended up using a popular EK Success border punch with a thinner black and white polka. It's awesome when we can use those tried and true tools and still get excited, no?
 |
| So many details in such a small space |
In some places you can see the paper background peeking through- Love that look! However, when placing the photo block over all of those horizontal lines, I felt there wasn't the kind of balance going on that leaves me feeling satisfied, so I added weight to the photo by cutting into a photo strip printed overlay, also from Shimelle, and layered that into my photo mat block. To fulfill my visual triangle needs, there is a cluster at the bottom left and top right which echoes many of the sentiments expressed elsewhere in this page's embellishments. By the time I handwrote part of the title and laid down those gorgeous American Crafts Imprint Thickers, I knew this would be a treasured layout, even without a lot of details provided through journaling.
In Tegan Skwiat's example, she used plain paper to back her tape before punching, and I'll be honest, the clear acetate sheet did not give me a clean look- and I'm okay with that. Just like using ephemera and products with brand names that relate to my story, having a bit of the imperfect represented on this layout reminds me more of my "why" for celebrating this fun day alongside my mom and brother with a place in my scrapbook. It was our first road trip together, just the three of us, in ages, and I enjoyed it so much. The creative energy we ended up sharing, the laughter, seeing my brother trying not to enjoy making greeting cards and shopping for scrapbooking supplies, the unwanted advice-giving, ... yep, these are the perfectly imperfect moments that I want to remember in my family's (many, many) albums.
 |
| Sing it with me now, "We Are Fam-i-ly...: Photo Credit: Kelsey Brown |
Pop over to Shimelle's site and take a look at my finished page. And, craft happy, friends!


