

Thinking of some of my angels while driving through Rainbow, CA


 Love is in the air, and lately I've been thinking of, well, things I love! Specifically, "things" I feel like I need. Things, that aren't really things at all; like my family, cuddles and snuggles, creative time and space, good nutritious food, healthy communication... all the important stuff that gets me through life in as effervescent state as is possible. But "the greatest of these... is Love."
 I find it easiest to mix and match patterns and colors when I'm using papers that are all from the same collection. I'm in LOVE with the SEI Alpine wood grain patterns and color tones, so I knew that a few of these tones and wooden textures would form the neutral base of my page. I had this idea of highlighting the "O" and using a heart shape instead. I found a cute double heart on the cut apart sheet, which gave me some more ideas about the colors and embellishment choices to come.
 I also envisioned polaroid style frames around my new Posterboard alphabet stamps by Close To My Heart. Stamped in Chocolate ink on this cream and red grid two or three times to get that dark solid outline, and then shifted the stamp slightly without re-inking to achieve the shadow effect. Then I used my square punch to create identical openings in three brown, kraft flocked rectangles.
 I ended up with a lot of these little strips of paper and thought it would be cute to staple them all together and do ... something with them! My staples didn't quite work the way I envisioned, though, and I'd love for you to comment with a use for my little whatever it could be.
 To highlight my heart shape even more I framed it in red gingham, and backed it with a square of red. There was a line border pattern going around the red square, and only one line of the box shows... and that is just fine to me! I fussy cut with my exact-o knife around the outside of the heart shape and popped up the outside border with two sizes of dimensional adhesive; thin at the top and bottom, and thicker pop-dots on the sides. I thought it would look more dimensional that it did, so maybe if you try this yourself, either leave off the thin top and bottom dots, or double up the side pops.
  For contrast to all the warm colors, I added some silver Mr. Huey's ink to the background, and then layered silver ribbon, dots, and hearts stickers to each of my framed groupings. A double dose of hand cut hearts and a peach woodgrain in between put the focus on "L O V E," and left me a little room for my handwritten title add on, "it's all I need."
 |

 Often times craft stores will offer huge discounts on the previous season's supplies. I shopped my local Michael's with a 40% off coupon and was able to pick up 48 coordinating fall die-cuts in a large bracket shape, conveniently bound up in a book that I can thumb through, looking for just the right pattern. As soon as I saw this leaf printed page, I tore it out and threw it onto a large card base. The die cut happened to land half off the page and I thought, hmmm... I like that! A few splashes of Mr. Huey's ink in Gold added interest to the otherwise plain background. Then I stamped the acorn onto a sticker which I fussy-cut, added a couple bling brads, and voila!
 I'm not into waste, so I had to find home for the strip of leaves I had cut off. I wanted another die cut that was more neutral toned, and found it in this barely brown, burgundy rimmed piece. Too lazy to cut the end off my card, my eyes searched my cluttered desk, looking for a way to fill in that gap. Ribbon? no. More ink? no.
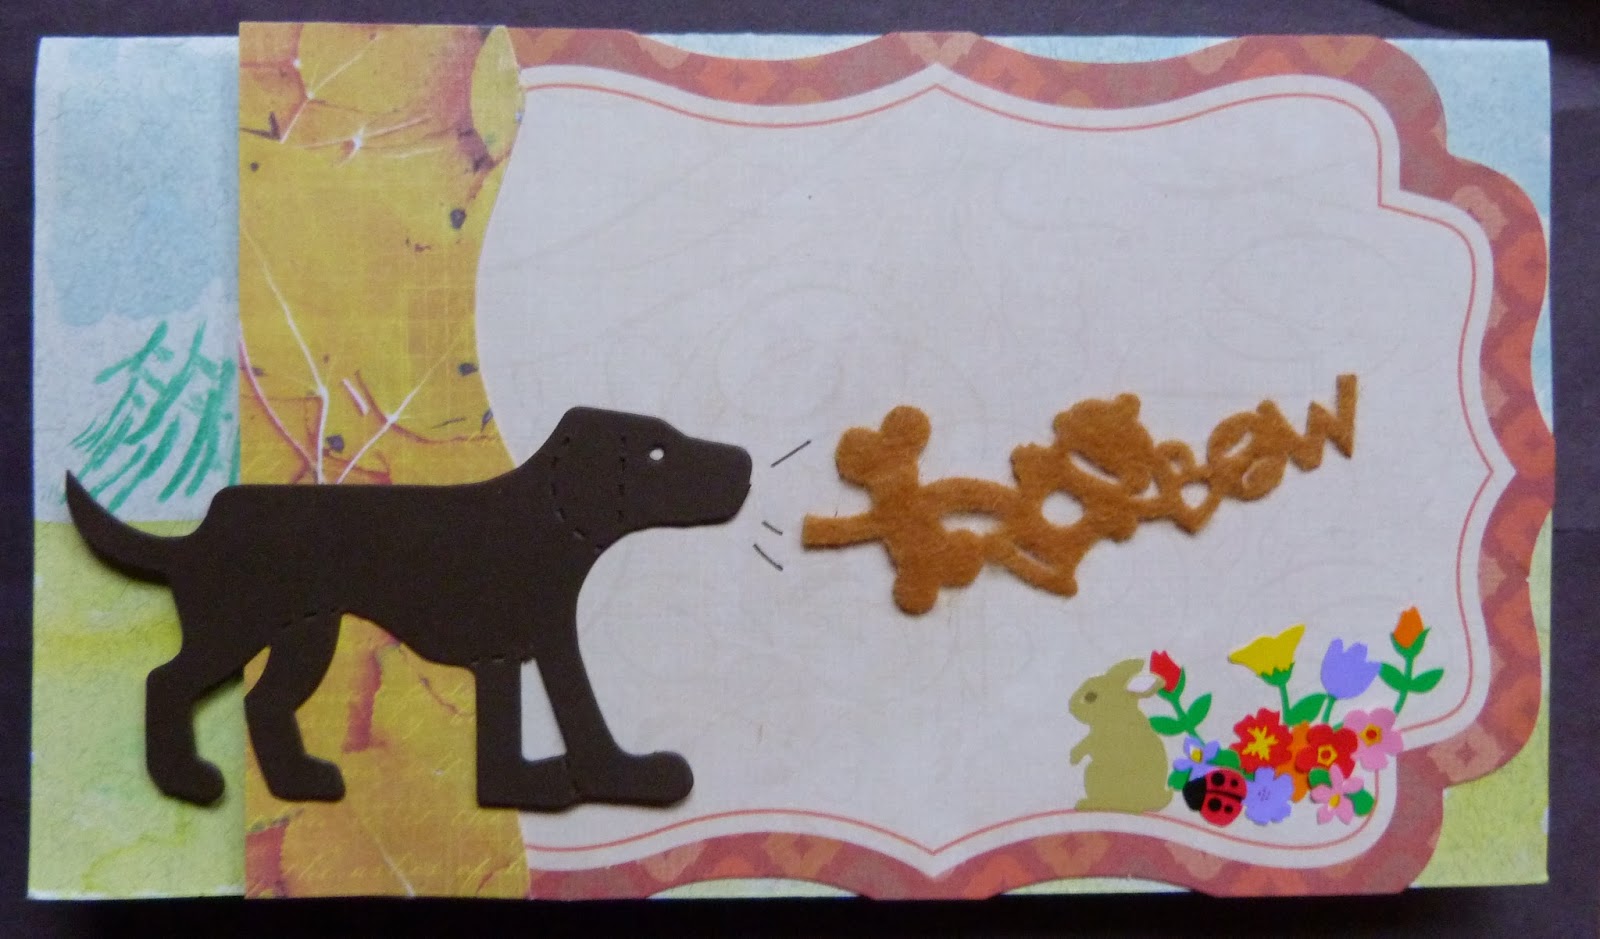
 Cute little doggy die cut that reminds me of the one my best friend's son once owned? Yes! A scene quickly built itself on the card with the addition of a die cut felt border, some whimsical flower and animal stickers, and the finishing touch of a water colored background.
 Well when I was looking around at my cluttered desk, I noticed these coasters collected from restaurant on a recent road trip. Remember these coasters from when you were little? My grandmother was a waitress for over 20 years, and growing up, nearly every Saturday morning my grandfather would take me to breakfast where she worked. I always thought it was so neat to be able to color and personalize my own coaster while he told me tales of his youth. The gold spray was still out, so I experimented with a little of that while I reminisced.
  Once I realized the gold border matched my die cuts, another card was quickly crafted! And yes, I did continue to shop from my scrap laying about :-) My young male co-worker was recently promoted and will be leaving our office. Despite the explosion of multi-colored blings and enamel dots, this card is still masculine enough to bid him good luck in his new position.
 After I laid my strips of tape down, my eye happened to fall on the stack of dollar bin embellishments I've been whittling down. I realized, I can use these Right Now! and with a few peels off their protective backings, a new page layout was in its early stages of development.


 What with all the online training, interviewing and sample making that was going on, I wasn't getting any ME time in, but yesterday I was able to create two more samples for classes, a layout to add to my album, as well as put together a card that my friend Joanne had die cut for me using the Cricut Craft Room program and our exclusive Close To My Heart Artbooking cartridge... I love the way everything turned out.