Showing posts with label Close To My Heart. Show all posts

Wednesday, February 3, 2016

Mommin' Ain't Always Easy...

One of my very supportive, extremely crafty friends recently ordered a card for one of her friends, and, I'll be honest, I do love me a special order. There is something very scary and yet liberating in being asked to interpret another's love into send-ible form. My prompts were, mom of two, and a new born, who is faithful... not much to build on, but that just left the door open for my own vision.
To get in the creative zone, I thought about how, the busier we are, the less time we take to appreciate what fills our life. I thought about how doing something alone, happens so very few times for busy new moms, and when it does, it's for something we never dreamed would be so enjoyable- a shower lol. About how sometimes when we feel overwhelmed, doing so much for other people, a little piece of happy mail comes to show us that someone we love, loves us too. I thought about what a beautiful feeling it is to hold your newborn in your arms... I thought about the vibrancy of the sunrise and how somehow, seeing that beauty can make all the difference when a new mom is up at the crack of dawn for another round of on-demand feeding.
So yes, I did channel my own personal feelings into the card, and of course it's no surprise that I love the way it turned out :-) But, actually , YOU may be surprised to know, I was! First, let me tell you how it was made, and then why I was surprised.
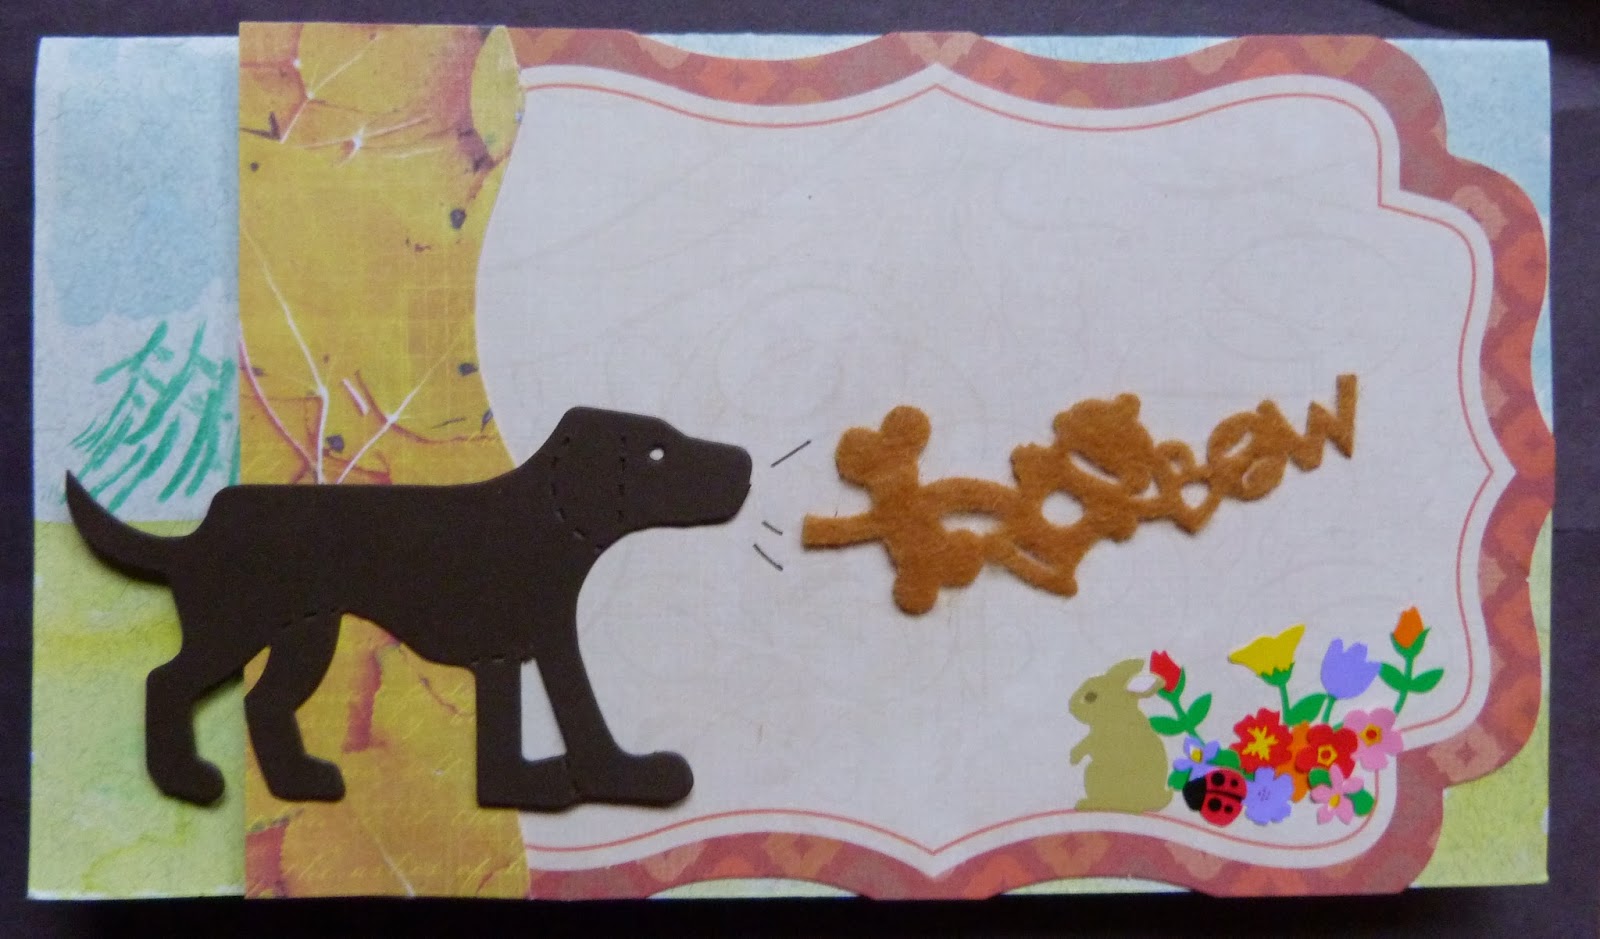
I started with a piece of watercolor paper and, after painting it with water, I floated some sky-like colors over the top and some green on the bottom. Then I went over that with some grey, imagining already the "path" of motherhood. Once all that was dry, out came the stamps, and I even did some masking to create some flower clusters in the grass. One on each side helped to ground the card front and frame my sentiment, and I actually thought far enough ahead of time to plan that out, lol. Then, I used watercolor pencils dipped in water to fill in the images. Last, my silver pen went over the spokes and other metal bits and really brought the bike to life. Of course, a busy mom would not have time to ride it, so it just sits there, kickstand down, and maybe she and her children are nearby putting those flowers in the basket... Hey, I love me a good story behind my makings! It's all part of the creative process for me.
So, why, after all this effort, and storytelling, and the musings of my heart being put into my project, was I surprised to enjoy the finished product? Because for some reason, this much effort usually results in a feeling of disappointment at the turn out. Especially, it seems, when my project involves stamping. I cannot tell you how many times I've labored over a card front, only to later lament how many I could have made- and liked!
This feeling of satisfaction was so foreign, I even offered to make a different card before giving it over to my friend for review... how's that for a selling point, haha. "I don't really think this is too good, but give me $7 for it, please, and then allow me to make ad give you another card that I'm sure you'll like better, for free." Wow. I can just see the repeat sales coming in! Is it any wonder my creative side rules over my business side?
So, will I be making more cards just like this? Not likely, despite my love of the way it turned out~ 'cause, I just don't tend to make anything the same way twice. Will I still take custom orders? Absolutely! Because like I said, I adore the challenge of making for strangers based on their friend's observations. Just imagine how your friends descriptions of you would differ from what you would write about yourself... But, dear reader, will I perhaps be a little more loving to my labored over creations in the future? That, is to be determined...however, my magic eight ball says, "Chances are Good."
Thanks for reading, and please, comment below; what are three character traits you adore about your current bestie? I'll be looking forward to attempting to make something in that description's honor, and posting it here... til then, thank a mom who looks a bit frazzled, and maybe even make something nice for her to show your sympathy <3

Thursday, November 20, 2014

An Unexpected Punch of Fun

I absolutely love this card I made yesterday! It has layers of My Mind's Eye papers, a Jenni Bowlin argyle transparency, and Lawn Fawn stickers, a combination that pops with color and all the fun of the holiday season.

At the Creating Keepsakes Convention earlier this month, I learned a fabulous technique for creating Shaker Cards. Mike from Queen & Co. taught us to use washi tape to close our cards... WASHI! One of my all time favorites!

I brought home a lot of sequins from the convention, a product I sought out after I realized I have almost depleted my meager supply of 10 or so sequins I've been hoarding as they fall off our daughter's clothes and from Christmas decoration clean up in years gone by. Yes, I am too cheap to spend a dollar to get a bazillion sequins and prefer the distressed-by-my-concrete-floor versions... NOT.

Beloved washi, meet newly acquired mega-stash of sequins. Sequins, meet Transparency overlay that I never know what to do with. Washi, meet transparency... now that we're all acquainted, put it all together and look what happens!

Well, if you're me, what happens is that all that fun creates a bit of a mess and the inside of your card suffers. But, if you're me you go looking for a way to cover up you fingerprinting mishaps, and participate in a challenge at the same time~

Jen Schow is a somewhat new YouTube process video-er who has done what I haven't figured out yet; gained over 500 subscribers in the short time she's been 'Tubing! What an accomplishment. Jen and I sort of know each other online as members of the Nicole Jones 911 Facebook group, which a lot of fun. And to celebrate her gratefulness at all the subbie support she's getting, she is offering up an American Crafts prize pack for punched project share submitters!

Here is how I used my favorite Close To My Heart Scalloped circle punch: as a peek a boo to the back side of the background to my shaker card front. I fussy cut a snowflake and layered that inside with a pop dot, and ran another strip of washi tape down the side. If I were a forward thinker, I'd have ran the tape down the side before punching, but I just cut a fringe along the edge and folded the tape over the scallops and no one (okay, non card makers anyway) would know the difference anyway.

Thanks for stopping by and let me see what you're making!


Friday, September 26, 2014

Inspired By...Fall Card Share!

Recently I was listening to a piece on NPR about how depression and art "go" together... hmmm, being an artist who doesn't think of herself as being clinically depressed, I was intrigued enough not to change the channel. In summary, there was a correlation between the surges of creativity or highs, that a depressed person might cycle through, and how being medicated can actually impair a creative (but depressed) person's ability to, well, create! Of course there was a lot more information and examples given, but this is the basic idea that continued swirling in my head.
The idea of the highs and lows of being a creative person got me thinking, reflecting really, and questioning my own spurts of activity. Sure there are times when I don't feel creatively productive, but I was asking myself, do those lows have anything to do with my being stressed, anxious, or even mildly depressed? No. As in, I have no idea!
It is a concept that I've considered before, and even witnessed. I have a dear friend who lost her son in a car accident, and there was a distinct period of mourning (of course), but I remember thinking to myself, "she's going to be as OK as she can be" when I noticed art coming from her craft room once again. It's scary, thinking that a life altering event or even just a bad case of the baby blues could interrupt what has become my therapy, my go to feel good activity! I have also considered, what would I do to lift the funk if I didn't have that outlet? Again, I have no idea yet.
Here is a handful of cards I made a couple of weeks ago.
On the other, more positive side of the craft room, I got a little personal insight it is that I can spend all night up with the kids and tossing and turning myself, get up at 4:AM to participate in a triathlon that is an hour an half's drive away, complete before mentioned tri, lead a five hour crop at Michael's (completing a two page layout) and then come home only to stay up late creating a total of seven cards before finally retiring to bed again. WHEW! It was exhausting just writing that paragraph long sentence!
Part of my seemingly endless motivation comes from the friendships I'm blessed to enjoy. My coworkers daughter will be competing in her own Tri- Iron Man style in AZ soon. Since she is a high school mate of mine I felt it was appropriate to support her efforts with a collage card (#1 Encouragement) reading "Give 100 & 1 % .
My mom is part of Women's Drinking Team -did you know those actually existed? Complete with custom jackets and Octoberfest attending, how fun! "Dancin Donna" can give the Danke! (#2 Octoberfest) card for her next Designated Driver! Using a few cuts from the cricut to dress up the front, Queen & Co. pearls and a bead strung on bakers twine, there was still something else needed to complete my card front. I found the answer in a bottle of Liquid Glass! I also added one small orange gem to the sentiment and included a die cut on the inside of the card which peeks out at the bottom. That die cut was printed with a pumpkin, so I didn't have to do another thing in there :-)
When I first started dating Ray, there were many examples of his past wander lusting interspersed with our futures plannings, and although we have not traveled as extensively as I had imagined, I would still go anywhere in the world with him if asked. I think. See the gold chevron on that card (#3)? and again on the inside of that top encouragement card? It is a new product from the K & Co, Smash line, and it is actually a rub-on. Very easy to use and it adds instant drama- something we are never in short supply of at our house!
Finally, to honor my triathlete Hall-of-Famer friend , I made a card with a .50 stamp picked out of the bargain bin which reads, "The time you enjoy wasting is not wasted time." Dedicating part of your life to fitness takes commitment, one that some people have a hard time relating too. I admire his enthusiasm for racing, and this card will be a nice thank you for all the "You can do it!"s he's given me over the years.
Thanks for stopping by and reading through my musings today! I based many of my card designs above on a flyer for Embellish It!s monthly card kit club. If you're looking to spend a little time crafting with me, check out my process videos link above. I've got a Halloween Card Magic three part series coming out over the next couple of weeks starting TODAY. Happy fall!   

Monday, August 25, 2014

Little Odds and Ends

Didn't get to make too much last week as I have been downsizing my collection of papers and momentos and have a ton of "junk" spread all over my workspace. Got so tired of that mess I shoved it all in a bag last night and was able to make two really cute cards you can see on my instagram feed today. (click the purple camera circle to the right to be taken there)
This card was made for a friend of a friend recently and was made with very little dimension, using stamps and lots of fun summery colors. I need a bit of something though, so I went over the heart with some Liquid Glass which turned it into a custom enamel shape. After this photo was taken I also added the glass effect to the Smile word too. Baker's twine and my favorite Queen & Co. bling twinkling dressed the card up further and then I drew on some stitching at the top left with my new alcohol pen freebie from the Scrapbook Expo last month.
So where does one house an incredible selection of acquired bling (brads are not included in this mix)? Why, in my Queen & Co. miniature suitcase, or trunk, of course! It's the perfect size for the tiny packages and I also recently organized it so I can show you how well all my rhinestones and pearls live together. There are also enamel dots in there. I have another trunk that I keep washi tape inside. A great reason to sign up for one of their classes at an event!
Speaking of, it's almost November! Well for most readers that will be insignificant and not worth mentioning, but for me it's the peak of my year as that month is when Seattle hosts the Creating Keepsakes Convention. You will see a lot more about this as it approaches so I won't spend too much time on it here, but it is on my mind of late and if you've never gone you ought to look into it. And start saving your money for the vendor fair lol (the paper is calling me DF)!
Anyway, having all my blings together in one place allows me to flip through them easily and also to reach for all my options with one lift of the arm. You can take a tour of my craft room here.
I'm considering a new shoot of my set up; some items have changed places since I uploaded that video, but for the most part my room is the same. More paperwork stuffed in out-of-sight places since last night, but otherwise... plenty of stash to shop from at home!
Thanks for stopping by today. I've got a new scrapbooking process video coming out this week, click on the purple YouTube link up at the top right and subscribe to my CraftWithAnna channel, do so and you won't miss any of my latest movies as they get online. Have a great week and make it crafty!

Friday, August 15, 2014

Die Cut Crazy Birthday Blog Hop!


 Welcome back! I'm glad you stopped by today, because there is a super fun birthday themed Blog Hop going on amongst my Co-Contributor's at DieCutCrazy.com. This month, Eric from the PaperWizard has donated a lovely piece of blog candy, so be sure to comment on everyone's blog for a chance to win that! If you can follow us on facebook and hit the Like button on my post from yesterday, you can win a little something from ME as well :-D We're all so excited for the launch of our new website too! I hope you enjoy my little birthday card, it's full of die cuts and should somewhat easy to duplicate in your craft space of choice :-)

Ah, birthdays... who doesn't love a good excuse for a party, huh? Well, I've been surprised over the years, how many people actually don't enjoy them, but I wasn't raised that way. Having a daughter born on New Year's Eve meant my mom sacrificed a lot of year end partying in order to make my birthday special each year. Even as I've gotten older and said things like, "Oh mom, do what you want this year, I'm grown enough to be happy with a special meal with my family." She just laughs and says she'll be on call lol. Without fail, she always mentions that it must be time for my half birthday, as well! What a mom :-D

For this card, I used die cuts from the Basic Grey RSVP ephemera pack. Using preselected, coordinated die cuts makes it so easy to create a card with lots of layers and depth; just select a few pieces that seem to fit together, glue them with some multi-dimensional adhesives, and voila! You've created an intriguingly beautiful card for your bestie, man, mom, or whoever's birthday might catch you off guard in the future. I was so excited for this hop, because it seems you can never have too many birthday cards on hand, am I right?

I have been wanting to use that flowered frame for awhile, and this project was the perfect occasion. There was a smaller frame within it that I wanted to have a little more lift too, so I managed to cut my very tiny foam squares even tinier to fit in that thin underspace. It can be kind of annoying when a corner of your foam adhesive peaks out from under your layers, but no worries, I usually just add some more layers on top! 

The bottom right corner where this happy little accident occurred was just the right spot to add some flowers. I chose one of shimmery fabric, and one made from mulberry paper,  the little brad holds it all together and eliminated the need to find yet another type of adhesive to hold it all together. Ever since I started selling my cards, the idea of my card not falling apart after I've made it is a lot more appealing.
Now, after adding the acetate flowers die cut under the frames, and the Party banner on top, my card was looking oh so festive, but I wanted it to be somewhat summery, so I thought about some stamp sentiments I could make work for me. A package of K & Co. die cuts with fancy borders has been very handy to have around, it came with four or five different shapes, and was very inexpensive at Michael's.  Ever made a stamping mask before? Simply stamp your sentiment or image onto a scratch piece of paper. I like to grab a post-it note, and there are lot's of new products out there made for this type of fun too. Another way to use the one word from this stamp would have been to just color in the word "garden" with a marker and stamp it that way onto that K & Co. die cut.
After stamping your image, carefully cut out the part of the stamp you want to show on your project. Line it up in the desired location, stamp over, and looky-here, you have a perfect stamped phrase without any mess.
It's nice to continue the theme of your card on the inside as well, so I stamped some CloseToMyHeart flowers off the page and a simple birthday sentiment to finish this birthday card.  Another advantage to the post it notes? They are thin and come in a variety of colors, so if you aren't the best stamper (like me) and you make a boo-boo,* you can just cut out the post it note version and cover your mistake right up, while adding another bit of visual interest!
*If you don't remember to mask the "nd" in "and" to make an "A," you can also work a little piece of cover up paper into your design and the recipient will never know the difference!


I love the way the plastic die cut adds some shine to my card. It was even shinier after I realized I'd left the protective plastic cover on it! Yeah, I noticed that after I'd glued all my layers down, tried to lift part of it back up, and tore the plastic. So I just took a deep breath, carefully lifted it apart, got the plastic off, and made a mental note not to do that again!
I hope you've enjoyed reading about how I spruced up my die cuts to make this lovely card, full of dimension. Now, hop on over to our new site, www.DieCutCrazy.com and comment on each blog for a chance to win that amazing layout from the Paper Wizard. Follow DieCutCrazy on facebook for even more inspiration, and tune back in to see my latest round of cards going out in the shops next week!
Enjoy...
xoxoAnna


Friday, July 11, 2014

ATC Ready to Win!

Artist Trading Cards- or Prize Winning tickets?
If you got one of these paper gems from myself or from The Paper Wizard's booth at the Puyallup Scrapbook Expo, or saw my post through facebook, instagram, or Twitter, and wound up here, you're in luck! Simply leave a comment below before July's end, and you could be a winner! Drawn at random from a hat, the recipient may choose from either a card or scrapbook layout made by me, and I will mail it out pronto. As promised in my last post, your envelope will be beautifully decorated as well.
Your prize inside will feature a multi-layer die cut. Don't know what a die cut is? or perhaps looking for some inspiration on how to use them? Take a look at the latest edition of DieCutCrazy, a digital magazine full of terrific tutorials, product reviews, and tons of photos of projects from around the world. All for just 0.99! Search for it in your Apple store or just click here.
    The last giveaway I had was for a YouTube milestone, so if you want a bonus entry, subscribe there to my CraftWithAnna channel. Click on the Process Videos tab above for more of my 'tube-ular If you'd like to follow my blog I'd appreciate that as well.
I'm honored you dropped my blog today, and look forward to our drawings end!
-Anna

Wednesday, June 18, 2014

Fathers Day Gift-Cards

Traditional gifts for dad this year in the form of a shirt from me and another shirt with tie from Rainier :-) in the form of handcrafted paper cards, of course! I saw this idea while surfing the web (working) last Saturday. We made them Sunday morning and I think that helped them look so crisp and fresh.
My card is on the left and used a six by six My Minds Eye sheet as the shirt base. Its a subtle dark grey pinstripe which paired beautifully with these dark greybuttons from an Sei album kit. There was no + sign in the glitter thickers, but a couple snips later it is barely noticeably pieced together.
Rainier has been using scissors since a very young age and I'm so proud to see her advanced skills in how closely she followed the outline of the tie on her card. I drew a line around the outside, which she cut around, then she cut closer to the line again, and finally, cut the line off. On the inside of the card (which she makes first for some reason, and I always leave for the end), she stamped DAD and drew her sister's name as well as her own, and some other...sentiments.
Dad loved his card and we love dad!

Tuesday, June 10, 2014

Faux Copic Marker Coloring


Today is my younger brother's birthday, and I'm sharing with you the techniques I used to make this adorable card for him. DIeCutCrazy has added some new contributors, and one of my new peeps, Deepti, recently shared a card made with a little monster. I had to grab an old set from CloseToMyHeart that NEVER gets used. Now, I'm in love! 
My little brother is a lot bigger than me, now. I laugh a little whenever we are introducing each other, becuase he literally towers over my 5'3" short self. But to me, he'll always be little, and he'll always be the monster that irritated me to no end as a teenager. Fortunately, I now realize there isn't anything that doesn't irritate a teenager, and I've learned to respect him and admire the man he's grown to be the last decade.
For my first technique, let me tell you how I gave my little monster such depth. I've been watching a lot of copic marker coloring tutorials, (even though I don't have any!) and decided to try my colored pencils at creating a similar 3D color look. Start by stamping your image in a light color. With your lightest color desired, lightly color in the entire image where applicable. For me, this was the light pink body of my space buddy. Now, grab a watercolor pen and, with small circular strokes, blend the color until it looks smooth.
Next you'll want to go for your darker colors. I chose to go for the darkest shading color of the dark purple in the creases and shadowy places. Again, blend with the watercolor pencil. Then fill in and blend with your mid tones, repeat until your are pleased with how it looks. Accent areas can be colored and blended with less color applications if you desire. I guess it depends on the sharpness of your pencils, or how many colors you have!
My brother is such an amazing guy. He can find the silver lining in any situation, he's a terrific friend and coworker, is always willing to lend a hand when he can, is a terrifically loving uncle, and in our house, is known as "the perfect movie date EVER," much to my honey's chagrin.
 For an out of this world effect in the background, I stamped stars with clear versamark ink, then heat embossed them with clear powder before painting over with some regular blue crayola watercolor paint. To acheive a constellation effect, I sprinkled salt on the wet paint! Once dry, I just brushed it off. Try layering a dab or two of another paint color over the salt for a really cool spacey look.
As I mentioned before, my brother's influence on me has taken on nicer significance the older we get. He taught me to share, how to recognize when winning is more important to another, and how to fart on command. Well, I never really got the hang of the last one... But who would I have been able to take out my teenage angst on? Who would I have screamed, "Get out of my ROOM!" at all those times, my parents? yeah right. 
On the other hand, who would have accompanied me on all those unapproved drives to go swimming with my friends, who would have lived with me for years (and never asked me to clean my room),  who would have taught me that family can be friends too? I remember vividly the day we brought him home from the hospital. In retrospect, my life changed for the better, and our household dynamic was made even stronger. 
To make your image really pop after all the color treatments, stamp over the image again with a darker ink, or for a more subtle look, use the light color you started with. Clear stamps make this really easy to do, but you can use a stamp-a-ma-jig or other stamp positioner too.  I even colored in the speech bubble and the monster's eyes with a white pen to make them extra bright, then went back with my colored pencil to darken the pupils.
On the back panel of purple paper, I stamped a repeated  calendar image. Then I overlapped that back panel and the card with a die cut star, to bring the layers together. My cropodile punched out the little circles from a multi-colored polka dot print by SEI. Here's a tip: apply little dots of glue where you want your small dots to go, and you won't end up with glue all over your hands. Or at least not as much glue :-) You can put all the glue down at once like I did, but I recommend doing it one dot at a time if you're a little more fastidious. 
My brother is really one of my best friends, and my life would be seriously lacking if I didn't have him around to bring a smile to our faces on a regular basis. A simple Happy Birthday stamp on the inside doesn't express that, but my happy little monster can hint at what a delight he is to have around, as he is pretty smile-inducing too. I hope you enjoyed some of the techniques I shared today, and feel inspired to try them yourself!
Happy Birthday, Jeremy!

Sunday, June 1, 2014

New Stamping Technique

Hi there stampers! My apologies if you stopped by here before and there was no text for this awesome new stamping technique, but let me tell you , it is super easy and the effect is awesome!
Simply lay a piece of washi or painter's tape across the paper you plan to stamp on. I used a couple sizes of flower stamps, but was thinking this could be really cute with some stars or firework-like shapes for the fourth of July coming up.
Randomly stamp around and over the top of the tape with an ink that dries fast, or thoroughly heat set your pigment ink. Carefully peel off the tape and you have a cool blank stripe going through your design!
The example I watched on YouTube was stamped with black ink on black paper. Hmm, you're right, it just barely shows. But, it shows enough that you could trace over the top with your colored pencils of choice for a really sketchy look. I decided to use dark red ink on purple paper for a more feminine look. I still filled in the flowers with watercolor pencils and I love the vibrancy of the color.
Embossing Powder shows off your Sentiment
A simple sentiment stamp down the center, embossed with either clear or otherwise colored embossing powder brings a bit more sparkle to the card. It would have been cute to add some tiny sparkles as well, either to the centers of the little flowers or even surrounding them in some of the emptier looking spaces. 
 For a little drama, and to help hide the fact that as usual, I miscut my paper and it doesn't line up perfectly with my card base, I added my rhinestones to the bottom right corner of the card, overlapping the focal piece and the background.
Now, go back with a ruler and run your colored pencil along the edge of the masked area to finish it off. Pretty, AND Awesome!

Monday, March 10, 2014

Wait! Don't throw that away?


I admit, I have a problem throwing away little bits of pretty paper. So I'm not surprised that I was inspired to create my own version of enamel dots with this tiny punched circle from a cricut cut tag I used.


It doesn't look like much, but you wouldn't believe how proud I am of this little shiny dot and it's friends!


They were really easy to make, I just  added a blob of Close To My Heart's Liquid Glass to the top and let it dry overnight on a shred of wax paper. I wanted to be sure it was really dry before I touched it because sometimes I get over eager and ruin things!


This isn't a project I would necessarily recommend, as it was a tad tricky getting the paper to come off the glue tip without spreading sticky all over the place, but it was fun, and now I know how to make a very coordinated little blingie for any layout that "needs" it. And since you bothered stopping by today, now you do too!

Thursday, March 6, 2014

No one in the World...


You may recall seeing the kit for this layout in my Special Edition: Packing for a Crop videos. The SEI flocked background was out of my comfort zone, but I think you'll agree, it really pops without competing!

I added a Glitz Designs sticker (thanks Cruise and Crop) as well as a Basic Grey brad (Big Lots, Ill be back!) to a globe die cut for a simple little anchoring embellishment cluster.
You know Im (a horder) into recycling and repurpousing... take a look at your packaging materials like I did for the fussy cut flower group on the left hand side.
A long title and a long row of bling, a journalling card cut in half to stretch behind my photos, and pictures of a little girl who makes my heart sing... I gotta say, love how it turned out! But...
Where are the stamps?
Heh heh gotta get crackin on incorporating my March theme product :-) pretty good reason to craft today, dontcha think?

Tuesday, March 4, 2014

Recent Plantings


I don't exactly have a green thumb, but even I could plant these lovely additions to our front yard.
For Rainier's birthday earlier this year, we returned to Gig Harbor's Java and Clay to paint more heart plates to add to our dishware collection. My mom and grandma were there with us and it was a four generation fun time!
You can't really tell how your painting will end up after the firing process. Of course, us talented girls created masterpieces- that slid noisily to the floor one morning a few weeks ago. To the CONCRETE floor. Only one survived, and I just couldn't bring myself to throw the shards of the other three into the garbage.
Mimi suggested we "plant" them outside, and that's just what we did in between rain squalls yesterday afternoon.  Now we have our little love blooms outdoors, where we can still see  them when we are getting in and out of the car!
They are pretty enough that I'm considering repurposing  the rest of our dishes!

Friday, February 14, 2014

L O V E


Love is in the air, and lately I've been thinking of, well, things I love! Specifically, "things" I feel like I need. Things, that aren't really things at all; like my family, cuddles and snuggles, creative time and space, good nutritious food, healthy communication... all the important stuff that gets me through life in as effervescent state as is possible. But "the greatest of these... is Love."


It's all I really need.


Everyone knows that Valentine's is the perfect occasion for getting a loved one a little something, like chocolate, or perhaps a beautiful card, maybe dinner out at a fancy restaurant, or my dream: A DIAMOND :-o
However, there are a few people out there who look at this special day more as a marketing gimmick than as an opportunity to make it magical. Those kind of people believe in spoiling everyday, not waiting for holiday occasions, and I'm lucky enough to live with a guy like that.


My sweetie has always been great at making dreams come true. He is usually willing to pick me up a box of chocolate - it fuels my creativity- when he's at the store. He loves to spend an hour or more gazing into my eyes as we dine on an exquisitely prepared entrée while dining out. However! He is completely against the purchase of diamonds because of the hardship their extraction places on miners in impoverished countries. What a Bummer for me!


Enter... my new favorite website to wish list on! The considerate folks at BrilliantEarth.com offer Beyond Conflict Free diamonds, meaning, not only are they considered conflict free, mined ethically and with respect for people, but for the environment as well! According to their website, they even track their diamonds from the source to the store, ensuring they arrive without being entangled in the corruptive practices that can profit from these valuable stones. Brilliant Earth even goes so far as to incorporate recycled and reclaimed gold, silver, and platinum. Wow, I think that's an awesome way to create beauty out of what someone else can't use anymore.


Hmmm... maybe I'll just casually place honey's name on their mailing list...


Here's how I created my Valentine's layout:
 I find it easiest to mix and match patterns and colors when I'm using papers that are all from the same collection. I'm in LOVE with the SEI Alpine wood grain patterns and color tones, so I knew that a few of these tones and wooden textures would form the neutral base of my page. I had this idea of highlighting the "O" and using a heart shape instead. I found a cute double heart on the cut apart sheet, which gave me some more ideas about the colors and embellishment choices to come.
  I also envisioned polaroid style frames around my new Posterboard alphabet stamps by Close To My Heart. Stamped in Chocolate ink on this cream and red grid two or three times to get that dark solid outline, and then shifted the stamp slightly without re-inking to achieve the shadow effect. Then I used my square punch to create identical openings in three brown, kraft flocked rectangles.

I ended up with a lot of these little strips of paper and thought it would be cute to staple them all together and do ... something with them! My staples didn't quite work the way I envisioned, though, and I'd love for you to comment with a use for my little whatever it could be.

To highlight my heart shape even more I framed it in red gingham, and backed it with a square of red. There was a line border pattern going around the red square, and only one line of the box shows... and that is just fine to me! I fussy cut with my exact-o knife around the outside of the heart shape and popped up the outside border with two sizes of dimensional adhesive; thin at the top and bottom, and thicker pop-dots on the sides. I thought it would look more dimensional that it did, so maybe if you try this yourself, either leave off the thin top and bottom dots, or double up the side pops.
Once my polaroid style frames were adhered atop stamped-letter-topped grids, I considered how I would dress them up. Some of my ideas included tying twine around the edge or bottoms, or adding enamel dots or brads, but in the end I added some red chipboard arrows on top of a sticker that I cut into three edge pieces and stuck to the left of each letter. From what was left in the middle of the sticker, I punched two hearts and placed them at the bottom right of my heart's polaroid.
For contrast to all the warm colors, I added some silver Mr. Huey's ink to the background, and then layered silver ribbon, dots, and hearts stickers to each of  my framed groupings. A double dose of hand cut hearts and a peach woodgrain in between put the focus on "L O V E," and left me a little room for my handwritten title add on, "it's all I need."


It's true. Despite all the things I want (chocolate, more washi tape, and yes, Diamonds) and feel I need; time with friends, being surrounded by family, having a creative escape daily, it all boils down to the fact that without Love, I'd be lost.


Check out the upcoming March edition of Die Cut Crazy to see even more fun ways to use the heart shape, Thanks for stopping by, and enjoy a Happy Valentine's!


I love you, Law!


Thursday, January 30, 2014

Advertisement Repurposed

I love a chance to use a bit of advertising in my projects, and once I realized the Lumber Liquidators flyer had all these choice samples of woodgrain in them (drool), I quickly started adding large cuts to my stash box.
My coworker will receive this on her birthday, along with another repurposed item I worked up for the February 2014 Valentine's themed issue of Die Cut Crazy. Be sure to check that out, I'm really proud of how it turned out!
You can see that I've made a little garden out of die cut Close To My Heart flowers, with enamel bling centers, and a cute butterfly flying about, trailing a few pearls. For some extra dimension I added my theme product of the month, baker's twine. Then I stamped the Celebrate phrase onto some scraps cut into banners. Pretty much anything outdoorsy, I put banners on!
 Anyway, these office cards get passed around for everyone to sign, and my card has a lot of delicate layers of embellishment on it. Imagine my horror at thinking of all the blings and flowers flinging off as the card slides in and out of an oh-so-secretive envelope. So, instead of walking it around personally to ensure no damage ensues, I sealed the top of the card with a bit of packaging cellophane.
Around the outside edge of the card I ran four pieces of double-sided Scrappy Tape. It has a peel off backing, so once I had that off, I could lay the packaging plastic right on top, and then trim off the excess. This worked beautifully and it felt awesome to hand it off for circulation care-free.
Tomorrow I'll be uploading a new movie (yeah!) and then on Saturday morning you can blog hop with the DieCutCrazy contributors as we share fun Valentine's tutorials.
My projects will feature some different ways to incorporate punched shapes in your backgrounds, so find a couple of your favorite dies or punches or cut files or whatever, and lets craft together!

Monday, January 13, 2014

Using Your Christmas Cards

What to do with all those beautiful Christmas cards received each year... some I admit are easier to toss than others, but really, what good do they do in a box in the closet, never to be looked at again. Aha! I finally found a home for three of them! The top left purple with silver ornaments actually came from PartyLite. How did they know to send me a card in my favorite colors?! The card behind the girls came all the way from Ed and BJ in New Jersey, and the Christmas Wishes sentiment was cut from the front of a card, complete with popped-up letters!

If you watched my recent Album Review movie on YouTube, you know that one of my favorite layouts ever created was one of Rainier in front of the Christmas tree at my bank last year. My Little Christmas Angel has grown up quite a bit in the last year and has a new sister to pose with as well... which meant, back to the bank for a photo shoot this year!
She walked right over to the tree (shedding outerwear all through the lobby as she went) and turned on the charm for my camera;  highly unusual behavior for her! Of course I didn't have the camera ready, but I still managed to snap a lot of great photos of her and Sunday. I love the way the tree shimmered and twinkled behind them. After our shoot those two amused themselves and the tellers by touching as many of the ornaments as possible.
I really wanted the focus of this layout to be on Rainier and the look on her face. I did get a photo of her with a great big smile, but this kind of look is more "her." Using a CTMH flip flap sleeve allowed me to hide her sister and the journaling in one place. I'll carefully slice through the page protector and this page will become interactive.
 If you look carefully in the border near the bottom of the page, you'll see I continued my baker's twine theme for this month in green and white, lime green and white, and purple with white. A little washi tape on the back of my layout keeps the twine in place just fine. Another goal of mine this year is to use my supplies, and I'm happy to report that another sticker sheet went in the garbage after this! So long, Teresa Collins fabrication stickers!
What do you do with your old holiday cards, or birthday, Mother's Day, etc.? I'm looking for a way to house the hundreds of cards Ray has been fortunate enough to receive from me over the last five years- any ideas? I'd love to hear them! Leave a comment below and you could win a repurposed card from me. What you choose to do with it afterwards is up to you :-)

Monday, December 9, 2013

Get Your Christmas Gifting On!

Hooray!
The latest editions of DieCutCrazy Magazine are available and chocked full of a massive amount of inspiration for you! As if that weren't fun enough, the magazine is also giving away a $25 Gift Certificate to one of my favorite web sites, TwoPeasInABucket.com
All you have to do is use this sketch to create something fabulous, email it to DieCutCrazyMag@gmail.com, and you could win!
Tonight is our Close To My Heart group's Holiday Party and I'll be crafting within a whirlwind tornado of paper so I' can bring something to share with my artistic friends. I have learned so much from each and every lady there over the last four years, they are all so fun to be around too. Isn't it wonderful how the different paths and avenues we walk in our life allow us to encounter people we may not have had the pleasure of meeting or spending time with otherwise? In the spirit of the holidays, I've been reflecting on the friends I've made through working at the bank, through selling PartyLite, though visiting the library's StoryHour, attending (albeit very irregularly) church, my arts and crafting companions... there is a saying that "friends are family you CHOOSE," and that's a great way to categorize these invaluable influences.
 Remember, YOUR creation could be featured in the January 2014 edtition :-) Good Luck, and Happy Crafting!


Friday, November 1, 2013

Die Cut Crazy Magazine Holiday Blog Hop!

 
Welcome to the Die Cut Crazy Magazine Holiday Blog Hop. The designers have made some wonderful holiday projects to inspire your own holiday crafting with your die cuts. If you just joined our hop, be sure and go back to the Die Cut Crazy Magazine Blog to learn how you can enter to win a prize from Die Cut Crazy Magazine when following the hop from designer to designer.  
 
The holiday project I am sharing today will inspire you to create a multitude of "say goodbye to fall" projects within a small budget. Can you say $10 or less!?

Often times craft stores will offer huge discounts on the previous season's supplies. I shopped my local Michael's with a 40% off coupon and was able to pick up 48 coordinating fall die-cuts in a large bracket shape, conveniently  bound up in a book that I can thumb through, looking for just the right pattern. As soon as I saw this leaf printed page, I tore it out and threw it onto a large card base. The die cut happened to land half off the page and I thought, hmmm... I like that! A few splashes of Mr. Huey's ink in Gold added interest to the otherwise plain background. Then I stamped the acorn onto a sticker which I fussy-cut, added a couple bling brads, and voila!

I'm not into waste, so I had to find  home for the strip of leaves I had cut off. I wanted another die cut that was more neutral toned, and found it in this barely brown, burgundy rimmed piece. Too lazy to cut the end off my card, my eyes searched my cluttered desk, looking for a way to fill in that gap. Ribbon? no. More ink? no.
Cute little doggy die cut that reminds me of the one my best friend's son once owned? Yes! A scene quickly built itself on the card with the addition of a die cut felt border, some whimsical flower and animal stickers,  and the finishing touch of a water colored background.

My little doggy looks as if he's speaking! Roughly translated, "Bone, fire hydrant, bow," means, "Let's Play!" 
If you've watched my latest videos, you'll understand, I've got CK on the brain! Every year my bestie and I attend a scrapbooking convention in Bellevue, WA, and as of today it is officially only ONE WEEK AWAY! This card will be a perfect lead-in to our weekend of creativity together. I love knowing that thinking of how much her son loved that dog will bring a smile to her face; a boy and his dog can be the best of friends, and she is certainly mine!


 Well when I was looking around at my cluttered desk, I noticed these coasters collected from restaurant on a recent road trip. Remember these coasters from when you were little? My grandmother was a waitress for over 20 years, and growing up, nearly every Saturday morning my grandfather would take me to breakfast where she worked. I always thought it was so neat to be able to color and personalize my own coaster while he told me tales of his youth. The gold spray was still out, so I experimented with a little of that while I reminisced.
Once I realized the gold border matched my die cuts, another card was quickly crafted! And yes, I did continue to shop from my scrap laying about  :-)  My young male co-worker was recently promoted and will be leaving our office. Despite the explosion of multi-colored blings and enamel dots, this card is still masculine enough to bid him good luck in his new position.

For these cards, I used the book of die-cuts pictured above and an acorn block stamp which I purchased at Michael's, Mr. Huey's Spray Ink in Gold, My Mind's Eye Enamel Dots, my Red Duck transparent adhesive roller, my daughter's Crayola watercolor set, bling and pearls by Queen and Co., as well as some very old stickers, die cuts, and cardstock from my stash. On this last card, the This Happened banner, corrugated arrow, and Congratulations stamp are all from Close To My Heart.

With my coupon, all of my supplies actually came to a whopping 5.49 at checkout, and I still have about 45 more die cuts to go towards my "say goodbye to fall" projects. You may even see a few of them in this month's edition of Die Cut Crazy Magazine!
 
Thanks for stopping by my post in the Die Cut Crazy Magazine Holiday Blog Hop! I hope my projects inspire you to create your own inexpensive holiday projects, and maybe even clean a little creative clutter off your desk.
 
In conjunction with this Hop, I am also celebrating the awesomeness of having TEN+ subscribers to my YouTube Channel! So, if you comment on any of my videos or blog posts from within the month of October 2013, including todays video and post as well,  I will put your name in a drawing for the first card I featured here today :-) You can enter by commenting as many times as you wish, and I'll draw the winning commenter at the conclusion of the Creating Keepsakes Convention, Saturday, November 9th at 6:00 Pacific Standard Time. Good Luck!
 
Next up in the hop is  Allie .  Go see the amazing project she has prepared for you to enjoy!
 
If you just joined the hop, here is a list of designers so you don't miss any


You Are Here --->Anna http://craftwithanna.blogspot.com


You can find all sorts of incredible inspiration at the Die Cut Crazy Magazine  site!


Friday, October 25, 2013

Special Edition: Packing For A Scrapbooking Crop!

I'm so excited to show you my system for creating To-Go Scrapbooking kits from my stash to take along to crop events!


First thing I do is gather a few photos that I really enjoy. Scrapbooking photos I love allows me to put all that fun energy I have from being at a crop event into my pages. Then I look through some magazines and books or cruise the 'net for some inspiration. I like to draw my own sketches from the pictures I look at, but there are many resources for pre-made sketches as well. Truthfully, I really enjoy drawing, and doing this gets my creative juices flowing towards collecting all my "stuff" quickly, AND enthusiastically!

Once I have a few sketches, I select the first photo spread that calls me, and begin gathering supplies based on the colors in the photos. Another way I make my choices is by considering, how do these photos make me feel... and then I select my papers and embellishments based on that mood I want to convey.

Beginning to bring in papers is such fun; if, when looking at my photos, a particular piece of patterned or solid paper seems to keep popping in my head, thats' what I grab. It could be that it ends up "going" perfectly, or if it doesn't, then I may use it for inspiration. Or, it could be that it ends up amongst the next kit created. Chances are that will happen because I don't like to put all my stuff away until I'm done or in between building kits- I do have two small children to look after! I also try to incorporate as much scrap material as possible. I'm toying with the idea of dumping my large scrap bucket upon leaving for this years Creating Keepsakes Convention. hmmmm

The same goes for stickers, or other embellishments. If a certain sheet or bling or button configuration is playing in my mind while looking at photos or while thumbing through bits of scraps, that's what I try to find. You can see how I store my sticker embellishments here:
 Makes it really easy for me to find the color scheme matches.

If I don't have photos, or I know of photos I want to scrap but don't have them printed yet, I will usually build off of an embellishment of some sort. If it the kit contents don't match what I print, I can either use the contents for another layout, or by simply adding a mat to the photos sometimes that will tie it all together.

I don't worry about alphabets, or paper size, or the perfect bling, because I tend to tote my alphabet box of stickers, paper trimmer, and bling box along with me, as well as a file of 12x12 sticker sheets. If I can't find what works amongst those tools brought along, I move on! (No, actually I usually buy about twice as much as I bring along- but not this year lol)

I think the most important strategy for creating these to-go kits is that I don't waste time second-guessing myself. If I see it and I like it, it goes in the kit. I'm not looking for the "perfect" match, I really try to trust my gut about whats happening. The great thing about having a multitude of somewhat hastily thrown together kits to take along is that, I don't have to use the kit if I'm not feeling it when I get there. AND most crops do have retail outlets available for purchasing if I feel desperate to scrap that particular set of photos.

I guess I was wrong about the most important strategy. THE most important part of this process is that I want to have it be FUN. If I start feeling overwhelmed, I stop the process. Because, really, it is all about having as much fun as possible, before, during, and while showing off what you've made upon return to real life :-)

I hope you enjoyed my process! Come back again next Friday, November 1st,  when I'll be announcing an opportunity for you to win some fabulously easily created cards in honor of a special occasion! Occasion will be announced on that date as well :-)

Meanwhile, what gets in the way of your cropping? Are you even sure you know what a crop is? My husband didn't :-) He now does, I did invite him to have one with me in my craft room but for some reason he didn't seem all that interested. Wonder why...

Happy Kit-ting!