Friday, January 31, 2014

DieCutCrazy Valentine Blog Hop!


Welcome to the Die Cut Crazy Magazine Valentine Blog Hop. I and the other designers have made some wonderful Valentine projects to inspire your own  crafting with your die cuts. If you just joined our hop, be sure and go back to the Die Cut Crazy Magazine Blog to learn how you can enter to win a prize from Die Cut Crazy Magazine when following the hop from designer to designer.  
 I have two projects to share with you, first, a scrapbooking process video using a square punch to dress up a background:

This is a two page layout- the half you can't see is where I used my punch (of course)!


 Next, I'm sharing with you a Memorial Scrapbook page! 
What A Guy 12x12 Scrapbook Layout
Now, scrapping about a departed friend may not be the typical way to lovey dovey up your albums, but I was inspired around 6:00 in the morning on Thursday to create this for my best friend and her daughter, who I know continue to love and think of this amazing guy all the time. I hit facebook and pulled off some pictures from his sister's album, and then I found some really nice comments and rememberances that seemed to sum up some of my own memories about him.
You can see that I also used a few heart punches and die cut letters as well.
Here's a fun tip: when you're pulling your die cut letters off a big sheet, pull Towards yourself. That way if the paper tears (as it always seems to do) the tears will be on the back of the letter instead of across the front.
Another fun tip: go around the outside of your letters with a coordinating marker. In this case I used a black marker around the edge of the black letters. It's a very subtle way to get rid of those chits left behind without using your scissors :-)
I wanted to show you how I went about printing on my 3x4 die-cuts by Me & My Big Ideas. First, I added the photos and phrases to a word processing document. Once printed, all I had to do was adhere my die cuts over those printed areas with some repositionable glue. I used Herma dots. Put the printed-on paper back in your machine with the die cuts stuck down, push print again, and Voila! Custom die cuts!
Sometimes I get a bit lazy when it comes to technology, so in some places I just punched out the space I desired and glued down the cut journaling strips or pictures with my trusty square punch you saw me using in the video.

My last little tip today is also a bit of a lazy admission: I love the look of sewed paper, but I don't want to get my machine out. So what do I do? Well sometimes I use some rub-ons, but usually I can draw some very nice dash lines and I get a terrific effect! You can see below here how I just set my Tim Holz ruler down on the page, and with a red Creative Memories pen, I drew dash lines. I usually turn or angle the ruler a couple times to make it look like I ran it through the "machine" a couple times. Most times, people looking at an embellishment like this won't be able to tell its not actually thread!
Thanks for stopping by the Die Cut Crazy Magazine Valentine's Blog Hop. I hope my projects inspire you to create your own lovey- dovey Valentine project.  Please leave a comment to let me know you stopped by.
I'm hoping you will  give me some ideas about what product I should feature in every project this month!
Next up in the hop is  Allie. Go see the amazing project she has prepared for you to enjoy!
 If you just joined the hop, here is a list of designers so you don't miss any. Remember, if you leave a comment on each blog, you will be entered to win a six month subscription to Die Cut Crazy! Good luck :-)


Die Cut Crazy Magazine  http://diecutcrazymag.com/


Thursday, January 30, 2014

Advertisement Repurposed

I love a chance to use a bit of advertising in my projects, and once I realized the Lumber Liquidators flyer had all these choice samples of woodgrain in them (drool), I quickly started adding large cuts to my stash box.
My coworker will receive this on her birthday, along with another repurposed item I worked up for the February 2014 Valentine's themed issue of Die Cut Crazy. Be sure to check that out, I'm really proud of how it turned out!
You can see that I've made a little garden out of die cut Close To My Heart flowers, with enamel bling centers, and a cute butterfly flying about, trailing a few pearls. For some extra dimension I added my theme product of the month, baker's twine. Then I stamped the Celebrate phrase onto some scraps cut into banners. Pretty much anything outdoorsy, I put banners on!
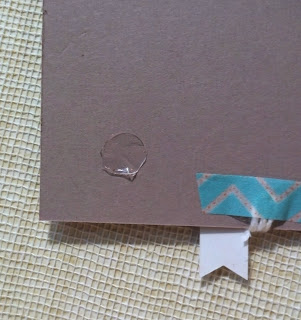
 Anyway, these office cards get passed around for everyone to sign, and my card has a lot of delicate layers of embellishment on it. Imagine my horror at thinking of all the blings and flowers flinging off as the card slides in and out of an oh-so-secretive envelope. So, instead of walking it around personally to ensure no damage ensues, I sealed the top of the card with a bit of packaging cellophane.
Around the outside edge of the card I ran four pieces of double-sided Scrappy Tape. It has a peel off backing, so once I had that off, I could lay the packaging plastic right on top, and then trim off the excess. This worked beautifully and it felt awesome to hand it off for circulation care-free.
Tomorrow I'll be uploading a new movie (yeah!) and then on Saturday morning you can blog hop with the DieCutCrazy contributors as we share fun Valentine's tutorials.
My projects will feature some different ways to incorporate punched shapes in your backgrounds, so find a couple of your favorite dies or punches or cut files or whatever, and lets craft together!

Tuesday, January 28, 2014

Christmas Cards Continued


I've been concentrating so much lately on getting organized around the house that I haven't taken much time to write about it, what a bummer. But, as usual, in between my chores I have still found ways to release some creative energy, so here is another fun way I figured to use my Christmas cards received this year; enter the hole punch.


This relic of our school days still comes in useful and makes it really easy to slip just about anything into a binder, provided it can span the width of two of the binder rings. Otherwise things get a bit wobbly, which bothers me, but may not bother you?

I put all these cards in between the couple of Christmas pages I've created and I love the way they break up the monotony of my regular 12x12 album pages. For some extra visual and textural interest I added this large chipboard piece and glued on all the postage that was on the mailing envelopes. I just couldn't let all those pretty little pictures go in the garbage :-)

I accomplished two things with this dash of inspiration: 1) I got that stack of Christmas cards received off my craft desk. Who put them there anyway!? Oh yeah, me, whoops! Anyway they are cleared and there is more room for crafting yeah! and 2)Now we have the names and addresses of those thoughtful clients and family members who spent the time and postage to let us know they were thinking of us over the holidays. Every year it seems like I hear of more and more people doing away with card sending. Even Ray has made the comment a few times, but of course I still make him take my homemade cards around to all his clients heehee.

I even included an extra Christmas letter card Rainier helped me make for my Close To My Heart friends. I think this is a really neat way to include a little summary of what I thought it was important to share with people I don't see very often but think of while crafting regularly. Since I didn't do any journaling yet on my Christmas layout, I now am feeling completely guilt free about what I consider to be "unfinished business."

Last bit of this post, and then I'm going to spend some time on a new process video I'm hoping to release in conjunction with this Saturday's Valentine Die Cut Crazy Blog Hop... I've got a couple other blogs started up and put some new posts on there tonight as well. So if you're interested in what I have to say about the latest in our families lifestyle/food choices, or what I'm up to with my PartyLite business, just click on my blogger profile and you'll see them listed under my name.

Thanks for stopping by!


Monday, January 13, 2014

Using Your Christmas Cards

What to do with all those beautiful Christmas cards received each year... some I admit are easier to toss than others, but really, what good do they do in a box in the closet, never to be looked at again. Aha! I finally found a home for three of them! The top left purple with silver ornaments actually came from PartyLite. How did they know to send me a card in my favorite colors?! The card behind the girls came all the way from Ed and BJ in New Jersey, and the Christmas Wishes sentiment was cut from the front of a card, complete with popped-up letters!

If you watched my recent Album Review movie on YouTube, you know that one of my favorite layouts ever created was one of Rainier in front of the Christmas tree at my bank last year. My Little Christmas Angel has grown up quite a bit in the last year and has a new sister to pose with as well... which meant, back to the bank for a photo shoot this year!
She walked right over to the tree (shedding outerwear all through the lobby as she went) and turned on the charm for my camera;  highly unusual behavior for her! Of course I didn't have the camera ready, but I still managed to snap a lot of great photos of her and Sunday. I love the way the tree shimmered and twinkled behind them. After our shoot those two amused themselves and the tellers by touching as many of the ornaments as possible.
I really wanted the focus of this layout to be on Rainier and the look on her face. I did get a photo of her with a great big smile, but this kind of look is more "her." Using a CTMH flip flap sleeve allowed me to hide her sister and the journaling in one place. I'll carefully slice through the page protector and this page will become interactive.
 If you look carefully in the border near the bottom of the page, you'll see I continued my baker's twine theme for this month in green and white, lime green and white, and purple with white. A little washi tape on the back of my layout keeps the twine in place just fine. Another goal of mine this year is to use my supplies, and I'm happy to report that another sticker sheet went in the garbage after this! So long, Teresa Collins fabrication stickers!
What do you do with your old holiday cards, or birthday, Mother's Day, etc.? I'm looking for a way to house the hundreds of cards Ray has been fortunate enough to receive from me over the last five years- any ideas? I'd love to hear them! Leave a comment below and you could win a repurposed card from me. What you choose to do with it afterwards is up to you :-)

Sunday, January 12, 2014

Take Two!

Here's another card inspired by the DieCutCrazy challenge sketch for this month!
It was really easy to make, I used background paper, and the die cut tickets from my Embellish it! February 2014 kit, as well as the Fancy Pants stickers and bakers twine included. A small piece of woodgrain washi tape twisted into a "stick" holds my stickers just like a backwoods sign! And falling blue bling snowflakes for extra wonder.
Head over to DieCutCrazy.mag and your sketch interpretation could win you a new Silouhette Cameo!

Friday, January 10, 2014

DieCutCrazy Contest-Inspired: "Take One"


Shout out to my cousin Luis in Indiana! This cards for you, dude :-D


Here is my first interpretation of our DieCutCrazy challenge sketch!
I'll be posting several on my blog and on instsgram @annabrdshw this month to promote the giveaway.
This all from the Alpine collection by S.E.I. If you are ever stumped for color or pattern combinations, looking within one brand or collection will help you blend patterns and colors effortlessly, After all, the designers have already matched it all up for you!
Told my daughter Rainier,  she would really like to win a prize for making a card....unfortunately she is only about to turn three and has not even tried to follow the sketch... kids!
Hee he hee hope you are feeling inspired to win a new silhouette Cameo too!


AND


now you can look through my last year of scrapbooking in the comfort of your home!

Anna

Create and Win!

Wouldn't you love to win one of those Silhouette Cameos all the designers seem to be using?! Or, if you already own one, wouldn't you love to win one for a friend- making you, the giver, the greatest. friend. ever!


The January issue of DieCutCrazy is available now and is loaded with inspiration as usual. You'll love Allie Gower's Candy box, and CarlyAnn Norman's shabby chic cards will make you swoon (Of course, I have a few fun articles in there too). Even more fun, the chance to win your very own Cameo is being offered!


Hop on over to DieCutCrazy's blog and view this month's sketch. Interpret this design into your own creation, take a picture of it, and email it to the magazine for a chance to win! It's that simple, and you'll have one of your Valentine's all ready to go :-)


Check back here tomorrow to see one of my takes; as a contributor of course I can't win, but I do love me a good sketch, so I'll be basing a few crafts off the contest guide. Happy Crafting, and good luck!

Tuesday, January 7, 2014

(H)our Attention Captured


I didn't know it when I started this layout, but for once, I appear to be scrapbooking chronologically! These pictures are from a trip our family took to Anacortes, WA this last November. The girls and I had a few hours to find some fun at the nearby Burlington Children's Museum (while their dad had his remaining wisdom teeth extracted).

I based my layout on Shimelle's sketch number thirty three for 2013. Her sketch puts the focus on the photo and allows for more journaling... I didn't include any journaling, but its possible I may in the future.

Behind this photo I layered a beautiful transparency from Jo-Ann's. A I recall, it came with three others in a package from the dollar bin. You can see how I used another of those transparencies in my Rainie Wears Glasses?! process video.

My personal scrapbooking challenge for this year is to focus on a different type of embellishment each month, and this month my product to use is Baker's Twine. A simple addition but I always like the look on other designer pages. So far, so good on incorporating a bit on each layout for this month.. of course, it's only a week in and so far I have made I think three. So three for three yippee for me!
One of my other goals is to use all those things I've had for years and not found a way to use them. So out from the dusty Cropper Hopper of never used vellum came this full 12x12 sheet of white netting. I layered the entire piece over another oldie but goodie: a  page from one of those big DCWV stacks of printed cardstock, circa 2009 :-)
 To secure my baker's twine I cut and covered the ends with a tiny piece of washi tape,  and then a glue dot in each corner of my photo mat worked to hold it against that net. For good measure I added a line of TomBow mono liquid adhesive after I got everything situated. I think it ended up a little crooked, but oh well.

Here's a look at the coordinating page on the left, using a lot of the same colors and another sheet from the DCWV Rustic glossy/glitter stack. Another, smaller piece of white netting in the bottom right corner for grounding and continuity... Kept it simple but I did sneak a small piece of baker's twine on this Amy Tangerine tag. I added some washi tape with music notes on it because at any children's museum, there are usually lots of instruments for kids to try out! I don't remember if we saw any at this one, but that's a minor detail that we can gloss over :-D


And here's the two page layout that comes before these pages. With just a little guidance from me, Rainier built this page featuring cute pictures of her and Ray posing for me in the backyard of the hotel we stayed at, the Shipwreck Inn. Great view of a harbor if you're ever looking to visit the Fidalgo Bay area. My favorite piece is that vellum envelope; inside is a handwritten note from dad to daughter saying how much he enjoys traveling with her. Awww!

Thanks for stopping by!

Saturday, January 4, 2014

First Layout of the Year!

 
What a thrill it was last night as I put on my finishing touches and completed (in one afternoon) my first layout of 2014! Excuse the poor picture quality, but I love the page so much I had to post it asap.
 
I was inspired by Sketch number 32 on Shimelle.com - her "sketch to scrapbook page" series always gives me a pattern to follow as closely as I want. Sometimes I completely reinvent my look, but this time I stuck to the pattern and I love the way my page turned out.
The main idea behind stacking all the photos, journaling, title, and embellishments on one side is that it leaves plenty of room for a gorgeous patterned background paper to show. Since I never seem to know what to do with those prints, I have practically eliminated them from my purchases in recent years. Which I realized as I went searching for one lol. The B sides of these larger patterns is usually something much more basic and that's what I tend to feel comfortable using. So what seemed like a really easy page to build actually took  me two or three dashes between chores into my scrap space to locate a background by Creative Imaginations,  and two photos that I could crop and stack.
These photos of the girls playing with Spunky the dog after mixing up some all natural, no sugar cookies are so fun and I love the expressions on all the subjects.  As Shimelle does on her example, I stacked some layers from an Echo Park pattern. That sheet is neat- on one side there are four patterns in 6x6 blocks, so I just used the two that seemed to go best. Under those I layered a beautiful peach woodgrain by SEI. I know you can't really see it, but it seemed to help bring all my colors together in a very unobvious way, Plus, I love woodgrain and SEI so its lovely just to have it in there for me :-)
Keeping my embellishment areas simple, a few pieces of  two border stickers from the same sheet the title came on look a bit like washi tape layers. I only added a few enamel baby themed dots and a couple twirls of bakers twine. Using a dot roller adhesive over the top of my twine before looping it onto my layout is an easy way to get my loops to stay put and not have to worry about messy glue getting all over the place.
For my title sticker, I had to use a bit of glue to get it to stick down.   To be honest, it's one sticker, that's been cut in two, and so you see part of the title on the left and the rest under the photos.  To be even more honest, it is a sticker Rainier and I used on a project a month ago, covering a Hubs peanut box with washi tape to brighten up the kitchen shelves a bit. Cause that's where the box is. Anyway, the stickers came off right away and I've had that Homemade Memories sticker stuck in a crack against the wall. Decorations in the kitchen! lol, I'm glad it has a home now where it won't get junked up.
So, what are your scrappy resolutions (if any) for this year? I'd love to hear of them!